Outdoor enthusiasts encounter various levels of challenge on different paths. A standardized classification system helps categorize these experiences by technical demand. This framework provides clear expectations before hitting the trail.
Knowing your route’s rating ensures proper preparation and safety. These classifications help match personal skill levels with appropriate adventures. Proper understanding prevents dangerous situations and enhances outdoor enjoyment for everyone.
This post explores one specific category within this system. We’ll examine its unique characteristics, required skills, and necessary gear. Preparation becomes crucial when moving beyond basic walking paths.
The transition to more technical terrain demands both physical and mental readiness. Route finding skills become essential, and exposure increases significantly. Understanding these ratings helps hikers progress safely over time.
Key Takeaways
- Trail classification systems provide standardized difficulty ratings for hikers
- Understanding these categories helps match routes with personal skill levels
- Higher classifications require increased technical skills and safety awareness
- Proper preparation prevents dangerous situations on challenging terrain
- Classification knowledge supports safe progression from easy to difficult routes
- Route finding and exposure management become critical at advanced levels
- Mental preparation is as important as physical readiness for technical hiking
Introduction to Trail Difficulties and Hiking Classes
Standardized classification systems emerged to help outdoor enthusiasts assess terrain difficulty accurately. These frameworks provide consistent language across the hiking community. Clear communication prevents misunderstandings and enhances safety.
Overview of Hiking Terminology
Hiking terminology includes various types of classifications that describe route challenges. Understanding these terms enables better planning and communication among adventurers.
Trail ratings consider multiple factors beyond simple distance. Elevation gain, terrain type, and exposure level all influence the final classification. Technical skills required also play a crucial role in determining difficulty.
Different hiking classes accommodate various experience levels. Beginners typically start on well-maintained paths while advanced climbers tackle technical routes. Proper classification helps set realistic expectations.
The Evolution of Trail Rating Systems
The hiking community developed classification systems to help people progress safely. Early systems used informal descriptions that varied by region.
The Yosemite Decimal System originated in the 1950s through the Sierra Club’s efforts. Created for Yosemite Valley routes, it soon became the North American standard. This structured approach replaced inconsistent local terminology.
Standardized systems allow hikers to understand trail difficulty regardless of location. Consistent ratings support safe progression from beginner to advanced routes. Proper preparation becomes possible with accurate classification information.
Understanding the Yosemite Decimal System
Among various rating methods, the Yosemite Decimal System has become the most widely recognized framework for classifying hiking and climbing routes. This standardized approach provides consistent communication across different regions and experience levels.
The system’s development addressed a critical need for universal trail ratings. Outdoor communities previously relied on inconsistent local terminology.
Historical Background and North American Adoption
The Sierra Club created this decimal system during the 1950s specifically for Yosemite Valley routes. Their work established a structured approach that replaced regional variations.
This classification method quickly gained acceptance beyond its California origins. It became the standard rating system across North America for both trails and climbs.
Classification Scale and What Each Class Means
The scale ranges from Class 1 through Class 5, with each level representing increased technical demand. Class 1 involves simple walking on well-defined paths with minimal risk.
Class 2 requires occasional hand use for balance during hiking. Class 3 introduces scrambling with significant exposure where falls could cause serious injury.
Class 4 represents climbing where rope use becomes recommended for safety. Class 5 denotes technical rock climbing requiring specialized equipment and protection.
Routes always receive classification based on their most difficult section. This ensures proper preparation for the highest challenge encountered. The system creates a universal language for outdoor enthusiasts.
Understanding this full spectrum helps adventurers recognize appropriate skill matching. Consistent standards support safety across diverse terrain types and experience levels.
What is 3rd class hiking? Detailed Characteristics and Considerations
Routes requiring frequent hand use mark the transition into more technical terrain. This classification involves scrambling where balance maintenance becomes essential. Natural hand holds on rock formations provide necessary support during ascent.
Key Characteristics of Class 3 Trails
Class 3 terrain typically features large boulder fields and steep scree slopes. The majority of the route involves scrambling rather than simple walking. Rocky sections demand careful foot placement and hand testing before committing weight.
These paths often lead to mountain summits with spectacular views. The technical effort rewards hikers with peak experiences. Route finding skills become critical as trails may lack clear markings.
Safety and Route Finding Essentials
Exposure presents significant risk where falls could prove fatal. Loose rocks may shift underfoot, requiring constant awareness. Helmets provide essential protection against rockfall and head injury.
Some beginners choose rope assistance on particularly exposed sections. Comfort with Class 2 terrain provides necessary foundation before advancement. Each hand and foot hold requires testing before applying full body weight.
Experienced hikers describe the sensation as demanding complete concentration. One adventurer recalled Table Mountain’s unstable terrain where everything crumbled with each step. Proper preparation prevents dangerous situations on this challenging class of route.
Gear Essentials for Outdoor Adventures
Proper gear selection transforms challenging outdoor experiences into rewarding adventures. The right equipment provides stability and protection when navigating unpredictable landscapes. Quality gear ensures safety while enhancing performance on demanding routes.
Must-Have Equipment for Rugged Terrains
Sturdy hiking shoes with excellent grip protect your feet on unstable surfaces. Ankle support prevents injuries when traversing rocky sections. These shoes maintain stability where balance becomes critical.
A helmet offers essential head protection against falling rocks. It provides security during scrambles on steep terrain. This piece of equipment can prevent serious injuries.
| Gear Category | Primary Function | Key Features |
|---|---|---|
| Footwear | Stability & Protection | Grippy soles, ankle support, waterproof |
| Head Protection | Safety from Rockfall | Lightweight, durable, comfortable fit |
| Navigation Tools | Route Finding | Compact, reliable, easy to use |
| Lighting Equipment | Visibility & Safety | Bright, long-lasting, multiple modes |
Featured FiTiFT Products for Enhanced Performance
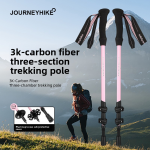
FiTiFT’s 3K Carbon Fiber Trekking Poles reduce strain on feet and legs. They provide balance testing on unstable rocks. These poles offer valuable support during long approaches.
The Multifunctional High-Intensity Flashlight illuminates early morning starts. Its USB charging saves time during preparation. The EDC Flashlight provides compact emergency lighting.
FiTiFT’s Compass Survival Whistle assists navigation and emergency signaling. This dual-function device prevents a lot of potential problems. It represents the best way to ensure safety in remote areas.
Proper gear preparation saves time and enhances outdoor enjoyment. Investing in quality equipment makes technical terrain more manageable. The right gear choices support successful adventures.
Step-by-Step Guide to Choosing the Right Trail
Effective trail selection involves matching personal capabilities with route characteristics for optimal outdoor experiences. This systematic approach ensures hikers choose paths that align with their current skill level and fitness.
Evaluating Trail Difficulty and Route Options
Begin by researching potential routes thoroughly using multiple sources. Trail reports, maps, and firsthand accounts from other people provide valuable insights into actual conditions.
Assess multiple factors beyond the basic difficulty rating. Consider total elevation gain, distance, exposure levels, and estimated time requirements. Technical scrambling sections demand extra preparation time.
When multiple paths exist, weigh technical difficulty against physical demands. A challenging scramble might save elevation gain but requires advanced skills. Longer routes often provide safer alternatives.
Planning and Preparations for a Successful Hike
Master Class 2 terrain before attempting more technical routes. This progressive approach builds essential skills and confidence. Each hike should represent a reasonable step up in challenge.
Download or print detailed route information before departure. Cell service often disappears in remote areas. Proper planning includes checking weather forecasts and seasonal conditions.
Honestly evaluate your recent hiking experience and comfort with exposure. People frequently underestimate the time required for technical terrain. Building generous time buffers into your schedule prevents rushed decisions.
A bit of extra preparation pays significant dividends in safety and enjoyment. This careful approach ensures each outdoor adventure remains rewarding rather than overwhelming.
Mastering the Art of Scrambling: From Class 2 to Class 4
Scrambling represents a unique outdoor skill that bridges hiking and technical climbing. This technique involves using both hands and feet to navigate steep, rocky terrain beyond standard hiking capabilities. Proper scrambling techniques transform challenging routes into achievable adventures.
Techniques to Navigate Rocky and Steep Terrain
Effective scrambling requires maintaining three points of contact with the rock surface. Always test hand and foot holds before committing your full weight. Keep your center of gravity close to the rock for optimal balance.
Foot placement techniques involve using the entire sole of your boot rather than just the toes. Look for solid rock features that won’t break loose under pressure. Move deliberately rather than rushing to maintain stability throughout the scramble.
Body positioning varies with terrain steepness. Face the rock directly on very steep sections, while sideways positioning works better on moderate angles. Route selection becomes critical—choose paths offering the most secure holds.
When to Rely on Hands and Feet in Scrambles
Class 2 scrambling involves occasional hand use primarily for balance over boulder fields. Hands become essential for upward progress during Class 3 scrambling on natural rock holds. The transition to Class 4 requires climbing techniques with rope protection.
Scrambling efficiency improves with practice gained over multiple outings. Many experienced adventurers find Class 3 scrambling offers the perfect challenge without specialized equipment. Each class level increases technical demands and exposure.
“Scrambling demands complete concentration—every movement requires intentional thought and careful execution.”
Proper technique development follows a natural progression from basic to advanced skills. Mastering each level builds confidence for more technical terrain. The right approach makes scrambling both safe and rewarding.
Safety Tips and Best Practices on Difficult Terrains
Navigating challenging routes demands unwavering attention to safety protocols. The consequences of a misstep on this class of terrain can be severe. Constant vigilance is non-negotiable when exposure is high.
Proper preparation forms the foundation of a secure adventure. This involves honest self-assessment of your skill level and experience.
Essential Safety Gear and Precautions
A well-fitted helmet is crucial for protection against rockfall and potential head injury. It is a necessary piece of equipment for most scrambles. Never assume rock stability; always test each hand and foot hold before committing your weight.
Hiking with reliable partners is highly recommended. You are essentially trusting them with your safety on exposed terrain. Maintain adequate spacing on the route to minimize rockfall danger for those below.
Clear communication is vital, especially to alert others of loose rocks. Descending often proves more hazardous than ascending the same terrain. A lot of accidents occur on the way down when fatigue sets in.
Weather conditions dramatically affect safety. Know when to turn back rather than risk a dangerous situation. Proper foot placement and route knowledge prevent most falls.
Even experienced people encounter close calls, reinforcing the need for respect and constant attention. Planning your exit strategy before entering technical terrain is a smart way to manage risk.
Enhancing Your Hiking Experience with FiTiFT’s Quality Outdoor Gear
Quality outdoor equipment transforms challenging adventures into memorable experiences. FiTiFT’s comprehensive product line addresses diverse needs from basic day trips to multi-day alpine expeditions.
Advantages of Using High-Quality Outdoor Equipment
Investing in reliable gear provides durability that budget options cannot match. This becomes critical in remote alpine environments where equipment failure poses serious risks.
Experienced people consistently choose quality equipment because they understand its value. Proper gear allows adventurers to focus on enjoying the natural world rather than worrying about failures.
Product Highlights: From Sleeping Bags to Flashlights
FiTiFT’s all-seasons sleeping bags provide essential warmth after strenuous days. The 2.2kg design offers comfort in Orange Gray or Blue Gray options.
The stainless steel wood stove features a smokeless design perfect for alpine settings. Hot meals significantly improve morale during multi-day trips.
| Product Category | Key Benefit | Ideal Use |
|---|---|---|
| Sleeping Bags | All-season warmth & comfort | Overnight alpine trips |
| Wood Stove | Smokeless cooking | Multi-day expeditions |
| Trekking Poles | Stability & balance | Technical terrain navigation |
| Flashlights | Reliable illumination | Early starts & emergencies |
Quality shoes with proper grip reduce fatigue on rocky surfaces. A bit of extra investment in reliable equipment pays dividends over time.
FiTiFT’s gear selection creates confidence when facing challenging conditions. People who regularly tackle difficult terrain appreciate this difference.
Conclusion
The progression from beginner trails to challenging alpine routes unfolds over years of dedicated practice. Understanding the Yosemite Decimal System helps hikers navigate this journey safely. Each level builds essential skills for more technical terrain.
Mastering scrambling techniques opens access to spectacular mountain views previously unreachable. Proper preparation with quality gear ensures safety on exposed sections. This balance of challenge and caution defines successful alpine experiences.
As one experienced adventurer reflects, “With time you can be climbing peaks and accomplishing routes you never thought possible.” The world of technical hiking rewards those who progress thoughtfully. Every summit reached represents personal growth and expanded capabilities.
FAQ
How does 3rd class hiking differ from rock climbing?
3rd class hiking, or scrambling, involves using your hands for balance and support on steep, rocky terrain, but it is not technical rock climbing. Routes typically do not require a rope for safety. True rock climbing, starting at Class 5 on the Yosemite Decimal System, demands specialized gear like ropes, harnesses, and protection for vertical or overhanging rock faces.
What essential gear do I need for a Class 3 scramble?
Proper footwear is critical; approach shoes or sturdy hiking boots with excellent grip are recommended. Many experienced scramblers also wear a helmet to protect against falling rocks. While ropes are not standard, carrying a map, compass, and plenty of water is essential for route finding and safety on challenging routes.
Is prior experience necessary before attempting a Class 3 route?
A> Yes, having some experience with off-trail hiking and Class 2 terrain is highly advised before moving to a Class 3 scramble. These routes require good balance, a head for heights, and the ability to navigate complex terrain. Building skills on less difficult mountains first helps ensure a safe and enjoyable alpine adventure.
Can you fall on a Class 3 hike?
Absolutely. A fall on Class 3 terrain can result in serious injury. The exposure—the feeling of being on a steep drop-off—is real. This is why using your hands for three points of contact, careful foot placement, and good judgment are vital for preventing a dangerous slip or fall.
Where can I find famous Class 3 routes?
Many iconic mountains around the world feature challenging Class 3 sections. In the United States, routes on peaks like Half Dome in Yosemite National Park (via the Cable Route) and the Keyhole Route on Longs Peak in Colorado are well-known examples that involve significant scrambling.