FiTiFT offers high-quality outdoor gear built to match a simple, smart system that keeps you dry, warm, and safe on trails.
This setup uses a base next to skin to move sweat, an insulating mid piece that holds warmth, and a protective shell that blocks wind and moisture.
That order helps manage body heat and moisture so you can add or remove items as conditions change over time. Merino wool and technical synthetics matter because they keep heat when damp, breathe well, and resist odor.
Modern membranes let water vapor escape while stopping outside droplets. Vents and adjustable hems reduce condensation during cool stops.
Think of each layer as a specific function, not extra bulk. Tops, bottoms, and small accessories work together to give better temperature control and fewer cold sweats on short walks or long mountain trips.
Key Takeaways
- Each layer has a clear job: move sweat, trap warmth, or block weather.
- Use merino and technical synthetics for best comfort and odor control.
- Adjust layers as effort and weather change rather than over-dress.
- Membrane shells balance breathability with waterproofing via vents.
- Smart layers cut bulk while improving safety on varied routes.
Why layering matters for hiking comfort, safety, and performance
Good layering turns your clothes into a responsive system that follows your body’s needs on the trail. During intense activity your metabolism can jump several times above rest and most of that energy becomes heat that must leave via sweat. Layers must move moisture outward so damp fabric doesn’t speed heat loss and risk hypothermia.
Smart choices keep temperature stable: vent on climbs, add insulation at breaks, and button up when wind or rain arrives. That quick micro-adjustment ability helps avoid chills during rests and overheating on steep uphill sections.
Fit and fabric matter. Close-fitting base pieces move sweat, breathable mid pieces hold warmth, and a shell gives protection from wind and precipitation. The result is better pace, fewer stops, and safer miles when conditions shift.
Think beyond clothes: augment your kit with FiTiFT safety accessories and lights so layers work alongside reliable navigation and visibility tools. A layered approach serves trail runners, day hikers, and multi-day backpackers alike.
- Physiology: your body makes heat and moisture; layers must move both.
- Responsiveness: multiple pieces beat one bulky garment for changing effort and elevation.
- Safety: staying dry reduces hypothermia risk if a storm or delay happens.
Base layer fundamentals: keeping skin dry to regulate body heat
Your first layer sits next to skin and its main job is simple: pull sweat away and move excess heat toward outer pieces. This action helps stabilize body temperature during steady climbs and quick rests.
Moisture control matters more than thickness. Choose fabrics that wick fast so dampness does not cool you at camp or on a break.
Best base layer materials: merino wool vs synthetic for moisture management
Merino wool stays warm when damp, breathes well, and resists odor on multi-day trips. Synthetics dry very fast and suit high-output day hikes, though they may need rinsing to limit smells.
Next-to-skin fit, weight, and odor control tips
Wear a snug next-to-skin fit that avoids air gaps but never limits movement. Flat seams cut chafe under pack straps and harnesses.
Go ultralight or lightweight for summer and hard efforts. Choose midweight for cool mornings or winter. Rotate or rinse synthetic pieces; carry a spare base to swap at camp for instant comfort.
| Feature | Merino wool | Synthetic | Recommendation |
|---|---|---|---|
| Moisture handling | Absorbs some, wicks, breathable | Wicks efficiently, does not absorb | Use merino for multi-day; synthetic for high-output days |
| Odor control | Natural resistance | Needs rinsing or rotation | Prefer merino on long trips |
| Weight options | Light to midweight available | Ultralight to midweight | Summer: ultralight; cold: midweight |
| Care and feel | Soft modern wool, low itch | Smooth under belts, quick-dry | Pick by comfort and trip length |
- Avoid cotton next to skin; it dries slowly and raises chill risk.
- Consider sleeve length and neckline to match sun exposure and strap zones.
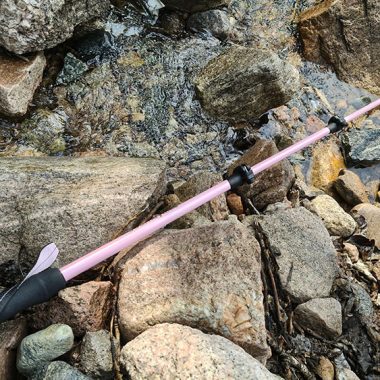
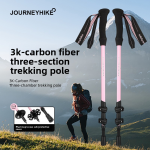
- Pair breathable tops and bottoms with FiTiFT 3K Carbon Fiber Trekking Poles (2-pack) – Green for steady pacing and fewer sweat spikes.
- Bring a FiTiFT EDC flashlight (USB+Box) – Red for pre-dawn starts when choosing layers at the trailhead.
Insulation layer essentials: trapping warmth without overheating
Your second piece should lock in warmth without turning your kit into a sauna. The mid layer absorbs moisture from the base and holds heat so body heat stays useful when effort drops.
- Fleece: fast-drying and reliable for everyday warmth; great as a light, breathable insulator.
- Wool: holds warmth when damp and resists odor; best for multi-day use but slower to dry.
- Down: unbeatable warmth-to-weight on dry, cold days but loses loft when wet.
- Synthetic fill: keeps insulating when damp and suits humid or mixed-precipitation trips.
Simple rule: add insulation before breaks and long descents; stash it before steep climbs to avoid sweating out the mid piece. Aim for a fit that traps air yet layers cleanly under a shell. Modular combos—a light fleece plus a puffy—give flexible warmth across changing terrain.
Keep a packable insulator handy and pair it with FiTiFT 3K Carbon Fiber Trekking Poles for efficient pacing. A FiTiFT EDC flashlight helps when you need to time insulation on chilly ridgelines during early or late starts.
Outer shell protection: wind, rain, and snow defense without the sauna effect
A reliable shell blocks wind and rain without turning your kit into a sweatbox. Good outer layer design balances weather defense with venting so warmth and moisture can escape during effort.
Hard shell, soft shell, and insulated options
Hard shells give maximum protection and stand up to prolonged rain and alpine wind. They use laminated membranes and sealable seams for serious weather defense.
Soft shells trade some waterproofing for stretch and comfort, great for cool, dry, or windy days when mobility matters.
Insulated shells add built-in warmth for low-output cold days or camp use without a separate mid layer.
Membranes, breathability, and condensation control
Membranes use microscopic pores to let vapor out while blocking droplets. Look for pit zips and two-way zips to tune airflow on climbs.
In freezing air, trapped sweat can condense or freeze inside a jacket. Open vents, loosen layers, or add a light insulator over a shell during long rests to reduce buildup.
Must-have shell features
- Helmet-compatible hood with a stiffened brim for visibility in storms.
- Long hem, secure cuffs, and a tight collar to stop wind and water.
- Accessible pockets that don’t clash with hipbelts.
- Durable, maintainable DWR rather than excessive chemical treatment.
| Feature | Hard shell | Soft shell | Insulated shell |
|---|---|---|---|
| Weather protection | Maximum (rain, wind, snow) | Light to moderate (wind, light rain) | Moderate; adds warmth |
| Breathability | Good with vents | High | Variable; depends on shell material |
| Best use | Alpine storms, long rain | Active, dry-cold days | Cold, low-output travel |
| Fit note | Trim with room for layers | Form-fitting for movement | Room for insulation |
Match your shell to trip conditions and practice quick changes. Carry a bright FiTiFT Multifunctional high-intensity flashlight (BicycleRack+USB+Box) – Orange for low light and storms. A smart jacket plus sensible under layers gives reliable protection without the sauna effect.
How to layer for hiking across U.S. conditions
A smart kit keeps you ready for pop-up rain, stiff gusts, or rapid temperature change on a trail.
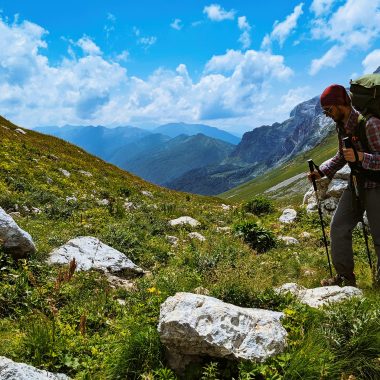
Warm days: wear a breathable short-sleeve base that dries fast. Add an ultralight wind shell for breezy ridgelines and stash a compact rain layer for sudden showers.
Warm weather layering
Pick breathable shirts and light hiking pants or convertible bottoms for airflow. Carry a FiTiFT Compass Survival Whistle 2 in 1 for signaling and the FiTiFT 3K Carbon Fiber Trekking Poles for stability on varied terrain.
Cool and shoulder seasons
Use a versatile fleece mid and a packable shell to handle cool mornings, midday sun, and passing rain. Convertible pants and a compact shell make this kit flexible across changing conditions.
Winter basics
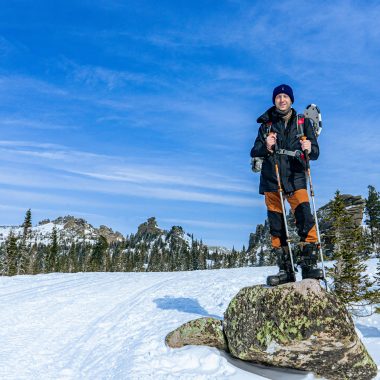
Start with a moisture-wicking base, add high-loft insulation, and finish with a hard shell that blocks sustained wind and snow. Vent often to avoid trapped moisture and carry extra socks and a spare base for longer trips.
“Adjust by elevation and region—humid summer storms and dry mountain gusts need different emphasis.”
- Test zippers and vents before you go.
- Pack a small repair kit and swap layers before long rests to prevent chills.
What is the three layer clothing principle in hiking? Putting the system into action
Leaving the trailhead a bit cool makes on-trail adjustments easy and precise. Small early choices save sweat and keep comfort steady as effort changes.
Match layers to activity, terrain, and trip length. Use the base for moisture management at all times and add or remove insulation to control warmth. Put a shell on for wind, rain, or when you stop on exposed ground.
Match kit to effort and hills
Steep climbs often mean moving in a base and stowing the mid layer until the ridge. Pace and terrain guide when to unzip, stash, or don warmth.
Pants strategy: base bottoms, hiking pants, and rain pants timing
Choose durable, mobile hiking pants that layer smoothly over base bottoms in cool weather. Skip base bottoms for mild days; add them for long cold or windy traverses.
- Start cool at the trailhead, add insulation at the first long pause.
- Pull on rain pants when precipitation persists or wind and spray combine to rob heat.
- Keep an outer layer on top of the pack for fast access in passing showers or gusty saddles.
- Pack a FiTiFT Multifunctional high-intensity flashlight for low-light approaches and a FiTiFT Compass Survival Whistle. Use FiTiFT 3K Carbon Fiber Trekking Poles to steady cadence, and carry a FiTiFT EDC flashlight as a lightweight backup.
After each trip, log what worked so your next outing starts with a dialed kit and faster choices.
Build your trail-ready kit: smart add-ons that support your layering system
Smart add-ons turn clothes and packs into a single, responsive system. Pick compact items that make swaps fast so you can lock in warmth or shed weight without wasting effort.
Navigation, light, and safety companions
Keep orientation and visibility simple. A Compass Survival Whistle 2 in 1 sits where you can grab it if rain reduces sight. Carry two lights: a Multifunctional high-intensity flashlight (primary) and an EDC flashlight (backup) for dusk and dawn work.
Camp comfort that complements your layers
Choose an all-season sleeping bag to lower the need for bulky camp clothes. A stainless steel wood stove helps dry a damp fleece and speeds meals so wet gloves or socks don’t linger.
- Stabilize effort: 3K Carbon Fiber Trekking Poles reduce surges so your jacket and shell do less work.
- Pack smart: store rain and insulation near the top for one-minute deployment.
- Repair and hydrate: tape, cord, and water treatment keep protection and body temps steady.
Conclusion
,Round out your setup so each piece pulls its weight when conditions change.
Recap: a proper base layer sits next to skin to move moisture and steady temperature. The insulating mid traps warmth without excess heat, and an outer shell gives wind and rain protection while keeping breathability.
Favor wool, especially merino, for odor resistance and warmth retention when damp. Match pants to the forecast: base bottoms for cold, durable hiking pants for abrasion, and rain pants for long storms.
Make small, frequent adjustments—zip, vent, cuff—to balance heat and moisture. Test combos locally, add FiTiFT gear (compass whistle, strong, reliable flashlights, carbon fiber poles, all-season bag, smokeless stove), and head out confident: base layer dry, insulation handy, shell ready.
FAQ
What does the three layer clothing system mean for hikers?
It’s a simple, adaptable way to manage comfort. Start with a next-to-skin base that moves sweat away. Add an insulating mid layer to trap warmth. Finish with an outer shell that blocks wind and precipitation while shedding moisture. Combine materials like merino wool, fleece, down, and waterproof membranes to match activity and weather.
Why does layering improve comfort, safety, and performance on trails?
Layering lets you control body heat and moisture fast. Stay dry to avoid chill, add insulation during breaks, and protect against wind or rain. That reduces hypothermia risk, prevents overheating, and keeps energy levels steady for better pace and focus.
How should a base layer fit and which materials work best?
Fit should be snug but not restrictive so sweat moves to the outer layers. Merino wool handles odor and warmth well; synthetic fabrics like polyester wick quickly and dry fast. Choose weight—ultralight for summer, midweight for cold—based on trip length and temperature.
When should I pick merino wool over synthetic base layers?
Choose merino for multi-day trips, cold conditions, or when odor control matters. Pick synthetic for heavy aerobic effort, wet climates, or when you need rapid drying. Both have solid roles in a balanced kit.
How do I use insulation without overheating on steep climbs?
Carry the mid layer and add it when you stop or feel chilled. Remove mid layers before hard climbs to avoid sweating out insulation. Pack a lightweight puffy—down or synthetic—so you can restore warmth quickly at breaks.
What are pros and cons of fleece, down, and synthetic insulation?
Fleece breathes and dries fast but can bulk. Down offers the best warmth-to-weight but loses loft when wet unless treated. Synthetic insulates when damp and dries quicker than down but typically weighs more. Choose based on expected moisture and weight priorities.
How do I pick between a hard shell, soft shell, and insulated shell?
Use a hard shell for heavy rain or snow—reliable waterproofing. Soft shells excel for breathability and light wind or drizzle while climbing. Insulated shells add warmth and simplify layers for cold, less technical days. Think about weather severity and effort level.
What shell features matter most for trail use?
Look for a helmet-compatible hood, adjustable hem and cuffs to seal out drafts, pit zips or large vents for airflow, and durable fabric in high-wear areas. Quality zippers and a good fit make a big comfort difference.
How do membranes and breathability affect condensation inside a shell?
Waterproof-breathable membranes like Gore-Tex balance wet-weather protection with moisture escape. Venting (pit zips, front zippers) helps prevent sweat buildup. For cold, manage layers and vents to limit internal condensation while staying dry outside.
How should I layer for summer hiking across U.S. climates?
Use a light, breathable base that wicks sweat. Carry a sun shirt or light shell for wind and afternoon storms. Pack a thin insulating layer for high-elevation or cool evening conditions and prioritize sun protection and ventilation.
What’s the best approach for shoulder-season hikes?
Choose a versatile mid layer—fleece or lightweight puffy—and a packable waterproof shell. That combo covers temperature swings and mixed weather. Adjust base weight depending on activity level and daylight hours.
How do I layer for winter treks to stay warm and dry?
Start with a moisture-wicking base, add a high-loft insulating mid layer, and finish with a sturdy hard shell for wind and wet snow. Include spare insulation in your pack for stops and emergencies, and prioritize hat and glove options.
How should I match layers to activity level, terrain, and trip length?
Higher exertion needs more breathable, lighter layers to avoid sweating. Technical terrain calls for durable shells and mobility-focused mid layers. Longer trips favor versatile, odor-resistant fabrics and repairable, packable pieces.
What’s the recommended pants strategy for trail use?
Use base bottoms or long underwear for cold, breathable hiking pants for most conditions, and pack waterproof rain pants for storms. Soft-shell pants work well for windy, cool days; insulated pants suit extended cold or low-mobility tasks.
What kit additions improve a layering system on the trail?
Carry a hat, buff, and glove set for fast warmth control. Lightweight gaiters protect from snow and debris. A small repair kit, extra socks, and a compact emergency blanket boost safety and comfort without much weight.
Which navigation, light, and safety items complement clothing choices?
A map and compass plus a headlamp with spare batteries are essential. Add a lightweight first-aid kit, multi-tool, and emergency shelter. These items help you manage stops and weather changes where layering matters most.