How Difficult Is The Hike? A Realistic Guide to Planning Your First Trek
Wondering how difficult is the hike you’re planning? You’re not alone. Many beginners focus on distance, but the true challenge of a trail comes from a combination of factors including elevation gain, terrain type, weather conditions, and your personal fitness level. This guide will help you understand what makes a hike “hard” and provide practical frameworks to assess any trail before you hit the path.
What Really Makes a Hike Difficult?
When researching trails, you’ll often see subjective ratings like “easy,” “moderate,” or “hard.” But these labels can be misleading since what’s challenging varies greatly from person to person. Instead of relying solely on these ratings, understanding the key factors that affect hiking difficulty will help you make better decisions.

Elevation Gain vs. Distance
Elevation gain often impacts difficulty more than raw distance. A 2-mile hike with 1,000 feet of elevation gain can be more challenging than a 10-mile hike with minimal elevation change. When assessing a trail, look at how much elevation you’ll gain per mile.
A good rule of thumb: 400-700 feet of elevation gain per mile is considered moderate, while anything over 700 feet per mile becomes increasingly difficult.
Weather and Seasonal Conditions
The same trail can vary dramatically in difficulty depending on weather conditions. Wind, rain, heat, or cold can transform an easy walk into a challenging trek. Always check the forecast before heading out, and be prepared for conditions to change rapidly, especially in mountainous areas.
Terrain Type and Trail Conditions
Trail surface plays a major role in difficulty. Well-maintained dirt paths are easier to navigate than rocky, rooty, or muddy trails. Technical terrain that requires scrambling (using hands for balance) significantly increases the challenge level and slows your pace.

Time on Feet and Fitness Level
Your personal fitness and hiking experience significantly impact how difficult a trail feels. A hike that takes an experienced hiker 4 hours might take a beginner 6-7 hours, increasing fatigue and risk. Be honest about your current fitness level when planning your first hikes.
Understanding Elevation: The Key to Assessing Trail Difficulty
Elevation is often the most challenging aspect of hiking, especially for beginners. Here’s how to interpret elevation information when researching trails:
How to Calculate Elevation Gain Per Mile
For out-and-back trails, divide the total elevation gain by half the round-trip distance. For example, a 6-mile round-trip hike with 1,500 feet of elevation gain would be: 1,500 ÷ (6 ÷ 2) = 500 feet per mile.
| Elevation Gain Per Mile | Difficulty Level | What to Expect |
| 200-400 feet | Easy | Gradual climbs, suitable for beginners |
| 400-700 feet | Moderate | Noticeable climbs, some challenging sections |
| 700-1000 feet | Difficult | Steep sections, requires good fitness |
| 1000+ feet | Very Challenging | Extremely steep, often technical terrain |
Reading Elevation Profiles
Elevation profiles provide a visual representation of the climb and descent along a trail. These graphs show where the steepest sections are located, helping you plan rest breaks and pace yourself accordingly.

Pro Tip: When looking at elevation profiles, pay attention to where the steepest sections occur. A trail with 1,000 feet of elevation gain spread evenly over 5 miles is much easier than one where all 1,000 feet is gained in the first mile.
Types of Hiking Routes and Their Difficulty
The type of route you choose impacts both the physical challenge and the navigation requirements. Understanding common trail configurations helps you select appropriate hikes for your experience level.
Out-and-Back Trails
These trails follow the same path in both directions. They’re generally easier to navigate since you retrace your steps on the return journey. For beginners, out-and-back trails offer the security of familiar terrain and the ability to turn around at any point if the hike becomes too challenging.
Loop Trails
Loop trails start and end at the same point but follow a circular route. They offer more variety in scenery but require more navigation attention since you won’t see the same landmarks on your return. Loop trails can be more challenging for beginners who might worry about getting lost.

Lollipop Trails
These trails combine an out-and-back section with a loop, resembling a lollipop shape. The initial path leads to a loop, after which you return on the same initial path. These can be good intermediate options as they offer some variety while maintaining a familiar return route.
Point-to-Point Trails
These trails start and end at different locations, requiring transportation arrangements at both ends. They’re generally more logistically complex and better suited for experienced hikers. The inability to simply turn around and return the way you came can increase the commitment level.
Essential Gear That Makes Hiking Easier
The right equipment can significantly reduce the perceived difficulty of a hike by improving stability, navigation, and safety. Here are key items that help beginners tackle trails with greater confidence:

Support and Stability on Challenging Terrain
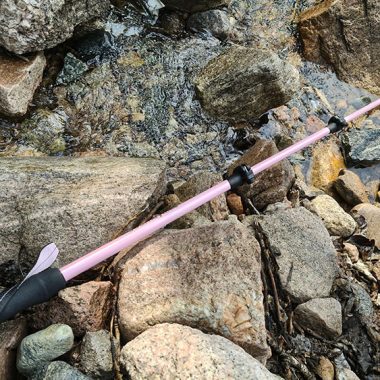
Trekking poles are perhaps the single most effective tool for making difficult hikes more manageable. They provide balance on uneven terrain, reduce strain on your knees during descents, and help distribute the workload to your upper body.
Reduce Fatigue and Increase Stability
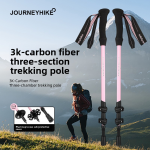
FiTiFT 3K Carbon Fiber Trekking Poles provide reliable support on rocky, steep, or loose terrain. Their lightweight carbon fiber construction reduces arm fatigue during long hikes, while the ergonomic grips and adjustable length ensure comfort for hikers of all heights.Get Your Trekking Poles
Navigation and Emergency Signaling
Getting lost can quickly turn an enjoyable hike into a dangerous situation. Reliable navigation tools are essential, especially when venturing beyond well-marked trails.
Navigation & Safety in One Tool
The FiTiFT Compass Survival Whistle 2-in-1 combines essential navigation with emergency signaling capability. Its durable metal construction ensures reliability in all conditions.
Reliable Lighting for Safe Hiking
The FiTiFT Multifunctional High-Intensity Flashlight ensures you can navigate safely in low light conditions. Perfect for early starts or when hikes take longer than expected.
UK Hills vs. High-Altitude Treks: Understanding the Difference
The challenges you’ll face on local hills differ significantly from those on high-altitude mountain treks. Understanding these differences helps set realistic expectations and prepare appropriately.

UK Hill Walking Characteristics
Most UK hills feature well-marked paths, relatively modest elevation (typically under 1,000 meters), and readily available services. Weather can change quickly, but altitude-related issues are rare. These trails make excellent training grounds before attempting more challenging high-altitude treks.
High-Altitude Trekking Challenges
Treks in regions like Nepal present additional challenges: reduced oxygen levels above 3,000 meters affect breathing and recovery, weather can be extreme, and services may be basic or limited. The combination of sustained daily hiking with altitude effects requires specific preparation and acclimatization strategies.
| Route | Days | Daily Hours | Max Altitude | Key Challenges |
| Everest Base Camp (EBC) | 14-15 days | ~6 hours | 5,555 meters | Significant altitude, cold temperatures, basic facilities |
| Annapurna Base Camp (ABC) | 13 days | 6-8 hours | ~4,130 meters | Steep sections, monsoon risks, cold nights |
| Langtang Valley | 7-10 days | 6-7 hours | ~3,900 meters | Some altitude effects, variable weather |
Altitude Tip: Above 3,000 meters, follow the “climb high, sleep low” principle and limit your daily ascent to 300-500 meters to reduce altitude sickness risk.
Sleep and Recovery: Critical for Multi-Day Hikes
Quality rest becomes increasingly important on multi-day treks. Poor sleep compounds fatigue, making each successive day feel more difficult. This is especially true at higher altitudes, where sleep quality often deteriorates.

A reliable sleeping system that provides adequate warmth and comfort can dramatically improve your hiking experience by ensuring proper recovery between challenging days on the trail.
Rest Well, Hike Better
FiTiFT Sleeping Bags for All Seasons provide reliable warmth across variable mountain conditions. Better sleep means better recovery, reducing the perceived difficulty of consecutive hiking days.Explore Sleeping Bags
Camp Cooking for Energy Restoration
Proper nutrition is essential for maintaining energy levels on challenging hikes. Hot meals become increasingly important in cold conditions and at altitude, where appetite may be suppressed.
Efficient Camp Cooking
The FiTiFT Stainless Steel Wood Stove provides reliable cooking capability with minimal fuel weight. Its efficient design works well at various altitudes and in different weather conditions, ensuring you can prepare hot, energy-restoring meals after demanding days on the trail.
Training Smart for Your First Big Hike
Proper preparation significantly reduces the perceived difficulty of any hike. A structured training approach helps build the specific fitness needed for trail challenges.

Cardio and Strength Training
Effective hiking preparation combines cardiovascular endurance with targeted strength work. Focus on exercises that mimic the demands of hiking: stair climbing, incline treadmill walking, and hill repeats for cardio; squats, lunges, and step-ups for strength.
| Training Element | Weekly Target | Why It Helps |
| Cardio | 3-4 sessions, 30-45 minutes | Improves endurance for long hours on trail |
| Strength | 2 sessions, compound lifts | Builds pack-carry resilience and joint support |
| Practice hikes | 1 long hike + progressive increases | Tests pacing, endurance and gear under real conditions |
| Acclimatization | Slow ascent + rest days at altitude | Reduces altitude sickness risk and improves recovery |
Practice Hikes with Gear
Incorporate your actual hiking gear into training sessions to test equipment and build familiarity. Use your trekking poles during practice hikes to develop proper technique, and carry a weighted pack to simulate trail conditions.
Progressive training is key: increase distance and elevation by no more than 10-15% each week to avoid injury while building capacity.
Planning Your First Trek: Practical Steps
Thoughtful planning is perhaps the most effective way to manage hiking difficulty. These practical steps help ensure your first significant hike is challenging but enjoyable.

Choosing a Route by Difficulty and Time Available
Select trails that match your current fitness level and available time. For beginners, start with shorter hikes on well-marked paths before progressing to longer or more challenging routes. Allow extra time beyond what experienced hikers might need.
Pacing and Rest Strategy
Develop a sustainable pace that allows you to maintain conversation without becoming breathless. Plan regular short breaks (5 minutes every hour) rather than infrequent long ones. Eat small amounts frequently rather than large meals to maintain energy levels.
Pacing Tip: On uphill sections, take shorter steps at a steady pace rather than long strides that quickly lead to fatigue. Use your trekking poles to establish a consistent rhythm.
Weather Windows and Seasonal Planning
Research typical weather patterns for your chosen area and plan accordingly. For high-altitude treks in regions like Nepal, understand monsoon seasons (June-September) and the ideal trekking windows (October-November and March-May).

Always check short-term forecasts before setting out and be prepared to adjust plans if conditions deteriorate. Having the right gear for changing weather conditions is essential for safety and comfort.
Making Any Hike More Manageable
The difficulty of a hike is never fixed—it’s a combination of objective factors like elevation and terrain, and subjective elements like your preparation and gear. By understanding these variables, you can make informed choices that turn seemingly challenging trails into achievable adventures.

Start with shorter, less demanding trails to build confidence and experience. Gradually increase challenge as your fitness and skills improve. Use benchmarks like the Nepal treks mentioned (EBC, ABC, Langtang) to gauge your readiness for more ambitious adventures.
Remember that proper gear significantly reduces perceived difficulty. Trekking poles for stability, quality lighting for navigation, and comfortable sleeping systems for recovery all contribute to making challenging hikes feel more manageable.
Ready for Your Next Adventure?
Explore FiTiFT’s range of hiking and trekking equipment designed to make outdoor adventures more accessible, comfortable, and enjoyable for hikers of all experience levels.Explore FiTiFT Gear
With the right preparation, equipment, and mindset, you’ll discover that the question “how difficult is the hike?” becomes less intimidating. Instead, you’ll focus on the incredible experiences and achievements that await you on the trail.
Frequently Asked Questions
How hard is hiking for a true beginner?
Difficulty depends on route, elevation gain, weather, and your fitness level. Start with short UK day hikes of 2–4 hours on well-marked trails to build stamina and confidence. Practice with a light pack, learn basic navigation, and increase duration gradually to avoid injury and excessive fatigue.
What key factors make a hike feel harder than expected?
Route technicality (rocky steps, scree, steep slopes), cumulative elevation gain, high-altitude oxygen loss, and poor weather all increase challenge. Poor footwear, heavy packs, low hydration, or inadequate rest also raise perceived difficulty. Plan for these variables to reduce surprises on the trail.
How does altitude affect time on feet and recovery?
Higher altitude reduces oxygen availability, which slows your pace, increases fatigue, and disrupts sleep. Expect slower daily distances and longer recovery at elevations above ~3,000 meters. Built-in acclimatization days, conservative pacing, and attention to symptoms help prevent altitude sickness.
What is a typical day on a multi-day trek like?
Many treks feature 4–6 hour walking days for moderate routes and 6–8 hour days for tougher sections. Expedition-style itineraries can include several long days back-to-back. Factor in breaks, photo stops, and terrain when estimating daily time on trail.
How do I choose a route based on time and difficulty?
Match route length and daily hours to your current fitness and experience. Start with a graded trail of similar distance and elevation gain, then advance. For high-altitude regions, allow extra days for acclimatization and choose itineraries with reasonable daily climb profiles.