Welcome to your complete resource for finding the perfect fit for your hiking equipment. Properly adjusted gear is a cornerstone of a safe and enjoyable outdoor experience.
This guide focuses on a critical piece of equipment for many adventurers. Correctly fitting this tool is fundamental. It directly impacts your comfort, stability, and endurance on the trail.
Using equipment that is the wrong length can lead to discomfort and reduced efficiency. It may even place unnecessary strain on your joints over long distances. Getting it right makes every step easier.
Our instructions cover basic measurement techniques and advanced adjustments for various terrains. Whether you are new to the activity or a seasoned explorer, this information is valuable. We provide actionable steps based on expert advice.
You will learn that initial setup is just the beginning. Understanding when and how to modify your setup based on changing trail conditions is equally important for optimal performance.
Key Takeaways
- Correct equipment length is essential for comfort and safety during outdoor activities.
- Improperly fitted gear can cause discomfort and reduce hiking efficiency.
- This guide offers step-by-step instructions suitable for all experience levels.
- The principles apply to both adjustable and fixed-length models.
- Proper setup enhances stability, reduces fatigue, and improves the overall experience.
- Adjustments may be necessary based on terrain changes throughout your journey.
Introduction to Trekking Poles and Their Benefits
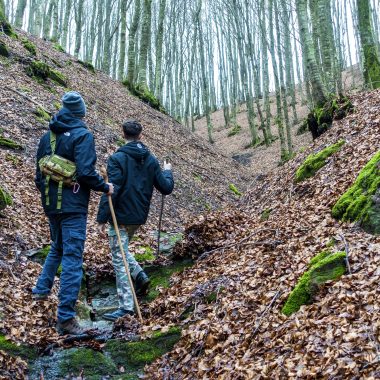
These versatile accessories have transformed the way people approach challenging landscapes. They provide critical support that enhances both safety and performance during outdoor activities.
Importance for Outdoor Adventures and Stability
Properly fitted walking aids offer multiple advantages for enthusiasts. They significantly improve stability on uneven surfaces and reduce impact on joints.
Many experienced hikers report that using two poles creates a four-point contact system. This distributes body weight evenly and minimizes slips on difficult terrain.
The equipment helps establish an efficient walking rhythm. This coordination between upper and lower body movements conserves energy over long distances.
Overview of Adjustable vs. Fixed Length Options
Two main types exist: adjustable and fixed-length models. Adjustable poles offer versatility for different landscapes and users.
Fixed-length options provide lighter weight and eliminate mechanical failure points. Beginners often benefit from adjustable models to experiment with various settings.
The choice depends on typical hiking terrain and elevation changes. Consider whether the equipment will serve multiple purposes like supporting shelters.
Essential Factors in Sizing Trekking Poles
Accurate equipment fitting relies on precise body measurements and established ergonomic principles. These foundational elements ensure your gear performs optimally during outdoor activities.
Using Body Measurements and the Rule of 90
The industry-standard method involves creating a perfect 90-degree elbow angle. Stand upright with the pole tip on flat ground. Your forearm should run parallel to the surface.
This positioning creates optimal leverage and comfort. The correct pole length forms a right angle at your elbow joint. This biomechanically efficient setup reduces strain on your arms and shoulders.
Height provides a useful starting point for selection. Individuals under 5’1″ typically need 100cm poles. Those between 5’1″ and 5’7″ often require 110cm models.
Hikers from 5’8″ to 5’11” usually find 120cm poles ideal. People 6 feet or taller generally benefit from 130cm lengths. These correlations account for average body proportions.
An alternative technique measures the distance from your elbow to the floor. This personalized approach accommodates unique arm and torso dimensions. Always wear your hiking footwear during measurement.
These measurements establish your baseline for flat terrain. Consider them a starting point for further customization. Individual preferences and specific trail conditions may require adjustments.
How to Size Trekking Poles
Establishing your baseline measurement for level ground is the first critical step. This foundation ensures optimal performance across various landscapes.
Step-by-Step Sizing Instructions
Begin by extending your equipment to the calculated measurement. Stand wearing your hiking boots on flat ground.
Hold the poles vertically with tips touching the surface. Your elbows should form perfect 90-degree angles. Forearms must remain parallel to the ground.
Make fine adjustments in small increments. Test the fit by walking naturally. Record this ideal measurement on the shaft for quick reference later.
Adjusting for Various Terrains
Uphill sections require shorter poles. Reduce the length by 5-10 centimeters. This change improves traction and reduces back strain.
Downhill hiking demands longer extensions. Add 5-10 centimeters to reach the lower ground effectively. This adjustment protects your knees from impact.
For multi-section models, adjust primarily from the lower segment. Keep the middle section nearly fully extended. This method allows easy changes without removing your hands.
Some experienced users prefer longer poles used in cross-country style. They vary planting positions instead of constantly adjusting length.
Practical Tips for Effective Trekking Pole Use
Beyond correct length adjustment, effective pole usage requires attention to grip mechanics and movement patterns. Proper technique maximizes stability benefits while minimizing physical strain during outdoor activities.
Proper Grip Techniques and Strap Usage
Correct strap configuration transforms pole handling efficiency. Insert your hand upward through the bottom of the strap loop, then grasp both strap and handle together.
This technique creates a supportive cradle that transfers force through the wrist rather than requiring tight hand pressure. Avoid the “death grip” by maintaining relaxed fingers.
The strap should bear most of the load during each plant. This approach significantly reduces hand and forearm fatigue over long distances.
Maintaining Balance and Preventing Strain
Coordinate pole plants with opposite foot movement for optimal stability. Plant the right pole as your left foot steps forward, creating a natural four-point rhythm.
Prevent joint strain by avoiding overreaching placements. Keep poles close to your body with comfortable elbow angles.
For knee protection on descents, plant poles slightly ahead to absorb impact before it reaches your joints. Proactive placement proves more effective than reactive use.
Insights from Expert Hikers and User Experiences
Individual preferences vary significantly among experienced users. Some prefer hands positioned higher than the standard 90-degree guideline suggests.
User experiences with knee strain reduction also differ based on individual physiology and hiking style. Many find adjustable models essential for experimentation.
| Technique Aspect | Standard Approach | Expert Variation | Key Benefit |
|---|---|---|---|
| Grip Pressure | Relaxed hand, strap support | Periodic hand opening | Reduces forearm fatigue |
| Planting Rhythm | Opposite foot coordination | Terrain-adaptive timing | Enhanced trail traction |
| Length Adjustment | Terrain-based changes | Single compromise setting | Practical efficiency |
On highly variable terrain, many practical hikers prefer a single compromise length rather than constant adjustments. This approach maintains rhythm while adapting planting technique for changing conditions.
Gear and Product Recommendations
FiTiFT has emerged as a leading provider of performance-oriented outdoor equipment. Choosing the right manufacturer ensures your gear withstands various trail challenges.
Highlighting FiTiFT’s Quality Outdoor Sports Gear
This trusted brand delivers reliable equipment for diverse adventure needs. Their products combine innovative design with practical functionality.
FiTiFT serves both casual day hikers and serious backcountry enthusiasts. Each piece undergoes rigorous testing for durability across different conditions.
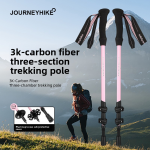
Featured Product: 3K Carbon Fiber Trekking Poles (2-pack)
The premium 3K carbon fiber construction offers exceptional strength with minimal weight. These adjustable accessories feature quick-lock mechanisms for easy trail modifications.
Three collapsible sections allow compact storage and versatile length customization. The set includes multiple tip options for various surface types.
Ergonomic cork handles provide comfort during extended use. These high-quality poles represent an excellent investment for regular hiking adventures.
Explore FiTiFT’s 3K Carbon Fiber Trekking Poles for your next outdoor excursion.
Conclusion
Achieving optimal trail performance requires more than just initial calculations. It demands ongoing refinement based on personal experience and terrain variations.
The Rule of 90 provides an excellent foundation for determining your starting point. However, true comfort and efficiency emerge through real-world testing and adjustments. Your unique body proportions and hiking preferences play crucial roles in finding the perfect fit.
Investing time in proper equipment configuration pays significant dividends. You’ll experience enhanced stability, reduced joint strain, and improved endurance across all trail types. Whether choosing adjustable models for versatility or fixed-length options for simplicity, understanding these fundamental principles ensures informed decisions.
View this process as an ongoing learning journey rather than a one-time decision. Quality gear from trusted manufacturers like FiTiFT makes the adjustment process straightforward while providing reliable performance. By applying these guidelines, you’ll transform your outdoor experience from good to exceptional.
FAQ
What is the basic rule for finding the correct trekking pole length?
The most common method is the 90-degree rule. Stand upright with your arms relaxed at your sides. Adjust the length so your elbow forms a 90-degree angle when you grip the handle. This provides optimal support and efficiency on flat ground.
How should I adjust my poles for uphill and downhill sections of a trail?
For uphill terrain, shorten each pole slightly to maintain proper arm angle and leverage. For downhill hiking, lengthen them to improve stability and reduce impact on your knees and joints. Always make small adjustments for the best traction.
Are adjustable or fixed-length poles better for hiking?
Adjustable poles offer superior versatility. They allow you to customize the length for different trail conditions, pack them down for travel, and share them with others. Fixed-length options are typically lighter but lack this adaptability.
What is the proper way to use the wrist straps?
Slide your hand up through the strap from below, then grip the handle so the strap rests between your thumb and index finger. This technique transfers weight to your wrists, not your grip, reducing hand fatigue and improving control.
Can trekking poles really help prevent knee strain?
Yes. By engaging your upper body, poles distribute the physical effort more evenly. This significantly reduces the load and impact on your knees, especially during long-distance hikes or when carrying a heavy pack.
What features should I look for in a quality pair of trekking poles?
Seek durable materials like 3K carbon fiber for a strong, lightweight build. Look for reliable locking mechanisms, comfortable grips, and interchangeable tips for various ground conditions. FiTiFT’s 3K Carbon Fiber Trekking Poles are an excellent example, featuring these key attributes in a two-pack set.