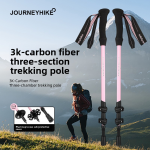
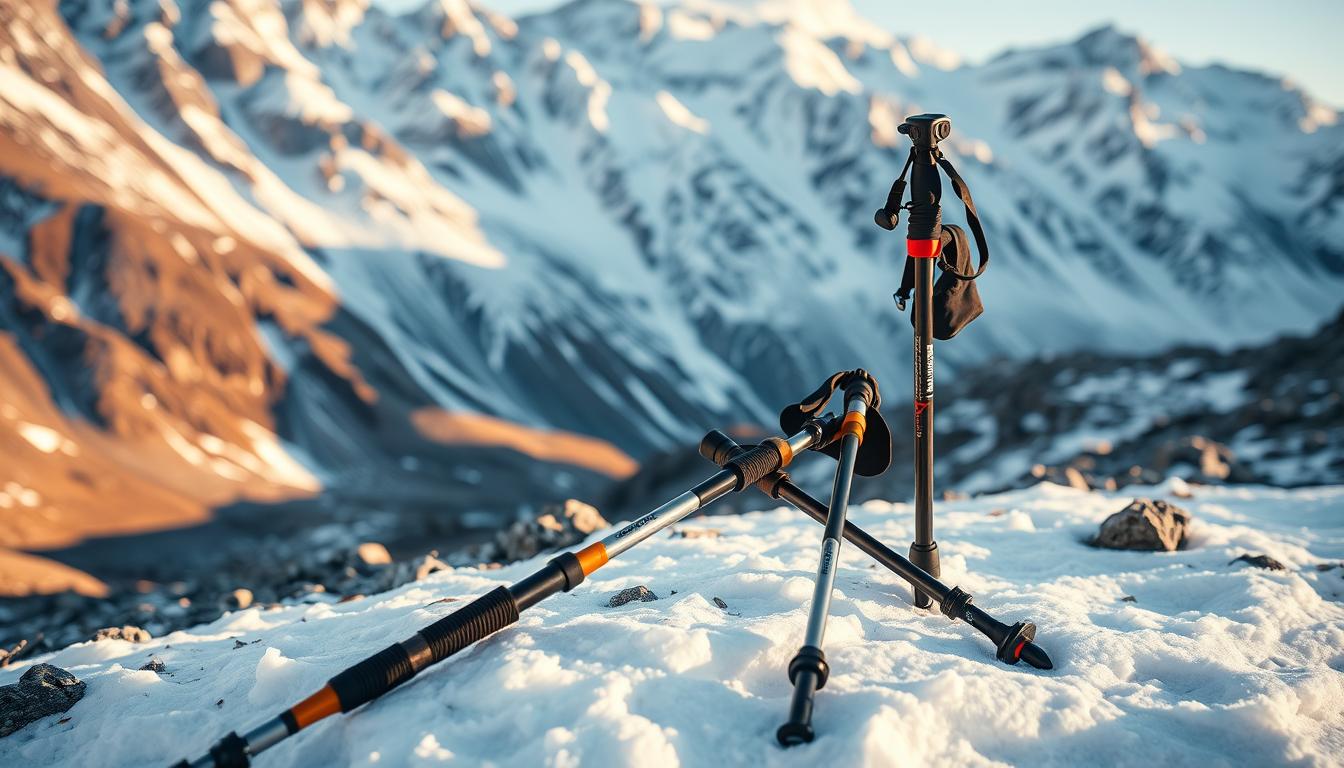
Trekking poles are more than a walking aid. They lift stability on steep or slick trail and cut downhill impact on knees by up to 30%.
Hikers from day-trippers to thru-hikers use them to keep an upright posture and ease back stress. They also add propulsion for a steadier hike and can serve as tarp or tent supports when needed.
This guide explains sizing, construction, locks, grips, and materials so you can pick a durable, comfortable pair. Expect clear tips on comfort, budget options like aluminum, and lighter carbon choices for big-mile missions.
Key Takeaways
- Stability matters: Poles reduce strain on knees and improve balance on uneven ground.
- Match use to design: Pick materials and locks based on whether you day-hike or backpack long miles.
- Comfort counts: Good grips and straps keep hands fresh on long trails.
- Versatility helps: Poles can double as shelter supports to save pack weight.
- Buy once, hike happy: Use these expert tips to select a reliable, long-lasting option.
Why trekking poles matter: comfort, stability, and real trail benefits
A reliable set of trekking poles makes long walks easier and safer. On heavy packs or rough terrain, they spread effort across four contact points so knees and back feel less strain.
Reduce impact on knees and back for longer, safer hikes
Hiking poles cut downhill impact forces by up to 30%, which adds up over steep days. That reduction helps you finish hikes fresher and lowers cumulative joint wear.
Straps and proper planting keep your hands relaxed and reduce grip fatigue. Use them with elbows close to your sides for best results.
Boost stability, speed, and even pitch a shelter in a pinch
Poles improve balance on wet roots, snow, and loose scree so you can react and stay upright when a foot slips. Timed pole plants also add propulsion, smoothing pace like a skiing rhythm.
- Versatility: Poles also serve as tarp or pole-shelter supports, saving pack weight.
- Confidence: In muddy or icy conditions, poles help turn a slide into a controlled step.
Use them thoughtfully: plant with purpose rather than overreaching. Benefits scale with terrain difficulty and carried weight, from short hikes to multi-day trekking.
How to choose the best trekking poles? Sizing and fit for your arms and terrain
Set a practical baseline before hitting the trail. A correct size helps your arms work efficiently and keeps hands relaxed during long hikes. Start with a simple test at home and adjust for different slopes.
Set pole length to a 90-degree elbow angle on level ground
Stand upright and place the tip beside your foot. Your elbow should form roughly a 90-degree angle.
A quick at-home trick: bend your elbow at right angle and measure from wrist to floor. That number is your baseline length for most hiking.
Dial in length for ascents and descents
Shorten about 5–10 cm for steep uphills so the pole plants near your feet and adds propulsion.
For descents, add a bit of length so your torso stays upright and the pole reduces knee impact.
Adjust unevenly for sidehills and variable terrain
On side slopes, make the downhill pole slightly longer than the uphill one. This keeps both arms near a right angle and improves balance.
- Check clamps after any change so settings don’t slip mid-hike.
- Keep sections clean for smooth adjustments.
- Practice quick tweaks on a short local hike until adjustments feel natural.
| Situation | Action | Typical change | Benefit |
|---|---|---|---|
| Level ground | Use baseline size | Wrist-to-floor measurement | Neutral posture, steady power |
| Steep ascent | Shorten poles | -5 to -10 cm | Better push, less overreach |
| Descent/sidehill | Lengthen/downhill longer | + a few cm / downhill longer | Upright stance, improved balance |
Tip: Small tweaks make a big difference on long routes. Re-check fit during longer hikes and you’ll keep hiking poles working for you, not against you.
Pole construction and length systems: telescoping vs. folding, plus locks
Pole construction and locking choices shape pack size, strength, and on-trail usability.
Telescoping shafts come in single, two-, and three-section designs. Single-piece sticks offer raw strength but no adjustability or compact packing. Two-section models are tougher and favored in winter and heavy use, though they pack longer. Three-section poles are most common for hiking; they balance adjustability, lower weight, and a shorter packed length.
Folding designs and lock systems
Folding “tent-style” poles collapse around a shock cord. They pack very small and suit fast-and-light trips and small backpacks. Many folding options limit length adjustment and can struggle when a shelter needs a precise height.
Locks matter. Flick or lever clamps work well with gloves and resist cold slippage. Twist locks are simple to service on-trail and let you retension shafts easily. Choose a system that matches expected terrain, weight needs, and shelter plans.
Materials note: aluminum bends and costs less; carbon saves weight but can snap under torque. Match the option to your use and carry weight.
Materials and grips: carbon vs. aluminum, cork vs. foam vs. rubber
Lightweight shaft choices and grip materials shape how a pole feels after miles on trail.
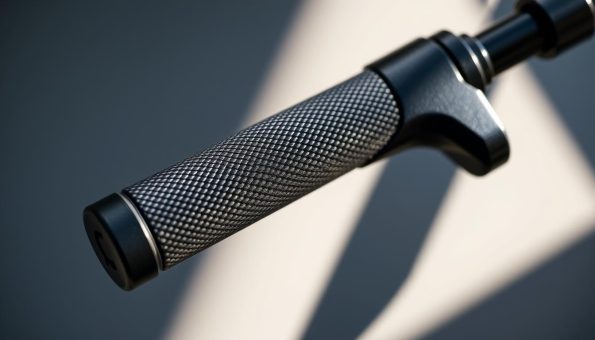
Carbon or aluminum shafts
Carbon saves noticeable weight and suits speed-minded hikers who count ounces. Carbon poles deliver lower overall weight but can fail suddenly under a hard side load.
Aluminum costs less and stands up to rough use. It will often bend before breaking, making it a solid value for daily hiking and rugged trips.
Grip materials: cork, foam, rubber
Cork molds to your hand, fights odor, and resists moisture—great for sweaty summer trails. Foam feels very soft but soaks up water and can wear faster.
Rubber stays warmer in cold weather and soaks up vibration. It can rub the skin on hot, sweaty days, so pick what fits your usual conditions.
Extras that matter
Try extended grips if your route rolls frequently—grabbing lower on the shaft lets you choke up quickly without adjusting length. Also test grip shape in your palm; a contour that feels secure makes long hikes easier.
- Quick rule: choose carbon for big-mile speed, aluminum for durability and value.
- Grip tip: cork or foam for warm-weather comfort; rubber for cold or gloved use.
- Balance: weigh total pack needs—many hikers keep an aluminum pair as an everyday option and step up to carbon for weight-critical trips.
Features that matter: shock absorbers, straps, tips, baskets, and packability
Smart features change a simple shaft into a versatile hiking tool for winter and summer use. Pick items that match your common terrain and season so a pair works for most trips.
Shock systems and tradeoffs
Shock systems ease downhill jolt and cut vibration for sensitive joints. Some shock absorbers can be toggled off when you need precise footing.
Note: absorbers may reduce uphill push and add weight. Try a model with a switch if you want both comfort and control.
Wrist straps and threading
Thread the strap by sliding your hand up through the loop, then place the strap under the wrist and rest the grip in your palm. This lets the strap hold the load while your hand stays relaxed.
Tips and rubber caps
Carbide or steel tips bite into dirt, mud, and icy crust for traction. Add rubber caps when you hit pavement or slick rock for quieter, gentler contact.
Baskets and season swaps
Small baskets work on most trails and avoid brush snags. Swap to large snow baskets for deep snow, powder, or muddy spring approaches.
Packability and locks
Folding and three-section designs pack small for a backpack or luggage and suit winter carries. Flick/lever locks are glove-friendly in cold; twist locks are easy to retension on the trail.
- Tip: build a pair that fits your season—big baskets, warm grips, and lever locks for winter; compact, quick-swap caps for three-season hiking.
Conclusion
,Finish strong by dialing in length, lock type, and grip so your sticks serve every mile. Set poles so your elbow sits near 90 degrees on flat ground. Shorten about 5–10 cm for steep climbs and lengthen for descents; tweak uneven sidehills for balance.
Pick a shaft system that fits your trips: telescoping for broad adjustability or folding for compact packs. Use flick/lever locks in cold and twist locks for easy on-trail retension.
Keep materials simple: aluminum for durability and value, or carbon if weight matters. Choose a rubber or cork grip that matches comfort and weather. Swap tips and baskets by condition, and consider shock features if joints need relief.
Practice quick changes and pack well so you can focus on the hike, not the gear.
FAQ
What makes poles useful for comfort and stability on trail?
Poles reduce impact on knees and lower back by spreading load from each stride. They improve balance on roots, scree, and river crossings, and they help maintain a steady rhythm that can increase hiking speed and reduce fatigue.
How should I set pole length for level ground and climbing?
Set a pole so your elbow forms a 90-degree angle when planted on flat ground. Shorten the pole for steep climbs to keep your torso upright and lengthen it for descents to increase braking power and reduce strain on knees.
What’s the difference between telescoping and folding systems?
Telescoping poles adjust in length with two or three sliding sections and usually lock with twist or lever clamps. Folding poles use hinged sections and pack very small. Telescoping models offer finer length control; folding options pack smaller and deploy fast for travel.
Which lock type is more reliable: flick/lever or twist?
Flick or lever locks (Cam Locks) are quick to use and work well with gloves. Twist locks can be lighter and sleek but need clean threads and occasional retightening. In winter or wet mud, lever locks are often easier to manage.
Carbon or aluminum — which material should I pick?
Carbon shafts weigh less and damp vibration better, ideal for long hikes. Aluminum costs less and tends to bend rather than snap, offering more visible warning of overload. For technical mountaineering, many choose aluminum for its predictable failure mode.
What grip material is best for sweaty hands or cold weather?
Cork handles wick moisture and mold to your hand, reducing hotspots. Foam is soft and warm, great for budget poles and cold hikes. Rubber offers the most warmth and durability on short hikes or for frequent on-pavement use.
Do shock absorbers help or hurt performance?
Built-in shocks can ease joint stress on long downhills. They add weight and slightly reduce direct ground feedback, so they’re best for hikers with sore knees or those tackling long descents rather than ultralight purists.
How important are wrist straps and how should I use them?
Straps transfer push force into your forearm and prevent losing a pole. Thread your hand up through the bottom and let the strap sit between thumb and index finger for support, then grip the handle. Proper use reduces hand fatigue and increases stability.
What tip and basket options should I carry for mixed terrain?
Carbide or steel tips give the best bite on rock and ice. Rubber tips protect trails and add traction on pavement. Small trail baskets suit most hikes; swap to larger snow baskets for winter and deep powder to prevent sinking.
Are folding poles safe for winter and glacier travel?
Many folding poles work well for winter if built strong and using metal tips and snow baskets. For glacier travel or technical mountaineering, verify that locking mechanisms and shaft strength meet guide standards — some professionals prefer fixed-shaft or heavy-duty aluminum models.
How compact should poles be for backpacking and airline travel?
Aim for a packed length that fits your pack or luggage. Folding poles are best for air travel and minimalist packs because they collapse very small. Three-section telescoping poles balance packability with on-trail adjustability.
Can poles double as a shelter support or tent pole?
Yes. Many trekking poles can act as a center support for tarp shelters or ultralight tents. Check packed size and sturdiness first; adjustable-length poles make shelter pitching easier than fixed-length sticks.
How much weight difference matters: carbon vs. aluminum?
Carbon can shave several ounces per pole, noticeable over long days. If you prioritize grams and fast-and-light hikes, carbon helps. If durability and cost matter more, aluminum provides value and rugged performance.