Ready for a clear, friendly guide that helps you face serious trail challenges with confidence? This intro lays out how we answer the key question and give a simple framework to pick a route for your next trip.
We explain how “hard” is measured today in hiking and backpacking, why that matters for people of all fitness levels, and how to prepare smarter. You will get plain language on the Yosemite Decimal System so scrambling classes make sense.
Expect real trail examples that test even seasoned hikers, plus planning tips to manage risk and save time. We link difficulty to practical gear choices so you match equipment to the adventure.
FiTiFT provides durable essentials—from compasses and whistles to sleeping bags, flashlights, trekking poles, and stoves—so you can feel ready from trailhead to camp. By the end, you’ll have a stepwise plan to take on tougher objectives safely and enjoy more outdoors adventures.
Key Takeaways
- This guide gives a clear framework to choose a route for your next trip.
- Learn how difficulty is measured and why it matters for people of any level.
- Yosemite Decimal System explained in plain language for safe planning.
- See real routes, risk management tips, and time-saving strategies.
- Match FiTiFT gear to challenge needs: navigation, sleep, light, and support.
- Progressive steps help beginners and veterans reach tougher objectives.
Understanding Hiking Difficulty Today: How Trails Are Graded and Why It Matters
Real trail difficulty comes from a mix of miles, vertical gain, and how rugged the path feels. Ratings that list only distance miss key details about effort and risk.
Common measures pair distance with total elevation gain and loss. Cumulative gain counts every up and down. For example, up 1,000 feet then down 1,000 feet equals 2,000 feet cumulative.
Altitude changes matter too. Above 7,000–8,000 feet you may slow down, tire faster, and need more water. That elevation can make a short route feel long.
Downhill sections can be as draining as climbs. Steep, rocky footing hurts knees and adds time to your day.
The AMC rule helps set expectations: plan roughly 30 minutes per mile of horizontal distance or per 1,000 feet of vertical. Use that way to pick a safe turnaround and avoid late returns.
- Read distance and gain together to compare routes.
- Don’t trust contour lines alone—look at steepness and switchbacks.
- Match pace, nutrition, and water to the expected time on trail.
The Yosemite Decimal System Explained for Hikers and Backpackers
The Yosemite Decimal System sorts outdoor routes into clear skill levels so you can plan with confidence before an outing.
Class 1 to hard Class 1
Class 1 means true hiking on a defined path. Difficulty at this level shifts with distance and elevation gain rather than technical terrain.
Class 2
Class 2 adds uneven ground, scree, and boulder fields. Expect some route finding and occasional need to use hands for balance on loose rock.
Class 3
Class 3 brings sustained scrambling on ridges and faces. Exposure increases; helmets are common and many parties plan simple belays.
Class 4
Class 4 involves steeper, exposed movement that often warrants rope and protection. Teamwork and clear route choices matter more here.
Class 5
Class 5 covers vertical rock climbing from 5.0 to 5.15d. In alpine settings, expect long approaches and multi-pitch moves on mountain faces and peaks.
Quick reference
| Class | Typical terrain | Key hazards | Common gear |
|---|---|---|---|
| 1 | Well-defined trail | Fatigue, distance | Boots, water |
| 2 | Scree, boulders | Loose rock, route finding | Sturdy shoes, trekking poles |
| 3–4 | Scrambling, exposed faces | Falls, poor rock | Helmet, rope basics |
| 5 | Vertical rock | Long falls, technical moves | Ropes, protection, shoes |
Progress gradually: practice route finding and footwork on forgiving terrain before moving to exposed routes. Read route descriptions closely—many paths mix classes and list the hardest level encountered.
The “Hard” Measures: Distance, Elevation Gain, Loss, and Altitude
A route’s effort shows up when you pair horizontal miles with total up and down vertical. Count every climb and descent to get cumulative elevation gain and loss. For example, up 1,000 feet then down 1,000 feet totals 2,000 feet of work and compounds fatigue.
Distance and cumulative elevation gain/loss
Distance alone underestimates effort. Combine miles with cumulative elevation to forecast where energy will dip and plan breaks. Track both gain and loss so you know where knees or energy will suffer most.
Elevation gain per mile and steepness
Use elevation gain per mile as a quick steepness check. A short trail with a big gain can feel harder than a long rolling mile. Scan contour lines and trace the trail line to spot switchbacks versus a direct climb.
High elevation effects above 7,000–8,000 feet
At around 7,000–8,000 feet thinner air slows pace. Expect increased fatigue, faster dehydration, and possible headaches. Build extra time into your plan and add water and rest breaks.
Why going downhill can be as hard as going uphill
Steep descents pound knees and require careful footwork. Loose or rocky surfaces slow pace and sap energy just like climbing. Bring poles to share load and protect joints on both up and down sections.
“Plan roughly 30 minutes per mile or per 1,000 feet of vertical, then add time for rough footing, altitude, and breaks.”
- Rule of thumb: 30 minutes per mile or per 1,000 vertical feet as a baseline.
- Adjust for terrain, heat, and altitude; add a safety buffer to your schedule.
- Use recent personal time data on similar climbs to refine estimates.
| Metric | Why it matters | Quick action |
|---|---|---|
| Distance (miles) | Sets base time for travel and pacing | Estimate baseline pace and start time |
| Cumulative elevation (feet) | Shows total work and fatigue points | Plan breaks where gain/loss concentrates |
| Elevation gain per mile | Reveals steepness and intensity | Check contour spacing and trail line |
| High elevation (7,000–8,000+ feet) | Affects breathing, hydration, and speed | Add water, rest, and extra time |
What is the hardest grade hike?
The toughest outings split into two clear types: technical climbs that demand rope work and long non-technical days that stack miles and vertical gain.
Grades by class versus extreme distance and gain
Class 5 routes top the Yosemite Decimal System. They require protection, anchors, and rock climbing skill.
By contrast, an endurance-focused route can exceed 15 miles and 5,000+ feet of cumulative gain and still stay non-technical. That kind of day tests stamina and recovery more than movement skill.
When exposure shifts difficulty from climb to endurance
Exposure matters. Class 3–4 scrambles add consequence. A short, exposed section can feel harder than a long, steady climb because a slip has bigger results.
Practical tip: many routes mix classes and grade by their toughest section. Let that section guide your gear and party choices.
- Distinguish technical level (Class 5) from sheer miles and cumulative feet.
- Fitness helps on long routes; practiced movement and comfort with height matter on exposed terrain.
- Scout photos and trip reports to find the crux and set realistic objectives.
“Pick challenges that match your limiting factor—endurance or exposure—and build up progressively.”
Real-World Hard Hikes in North America: Trails and Sections That Test People
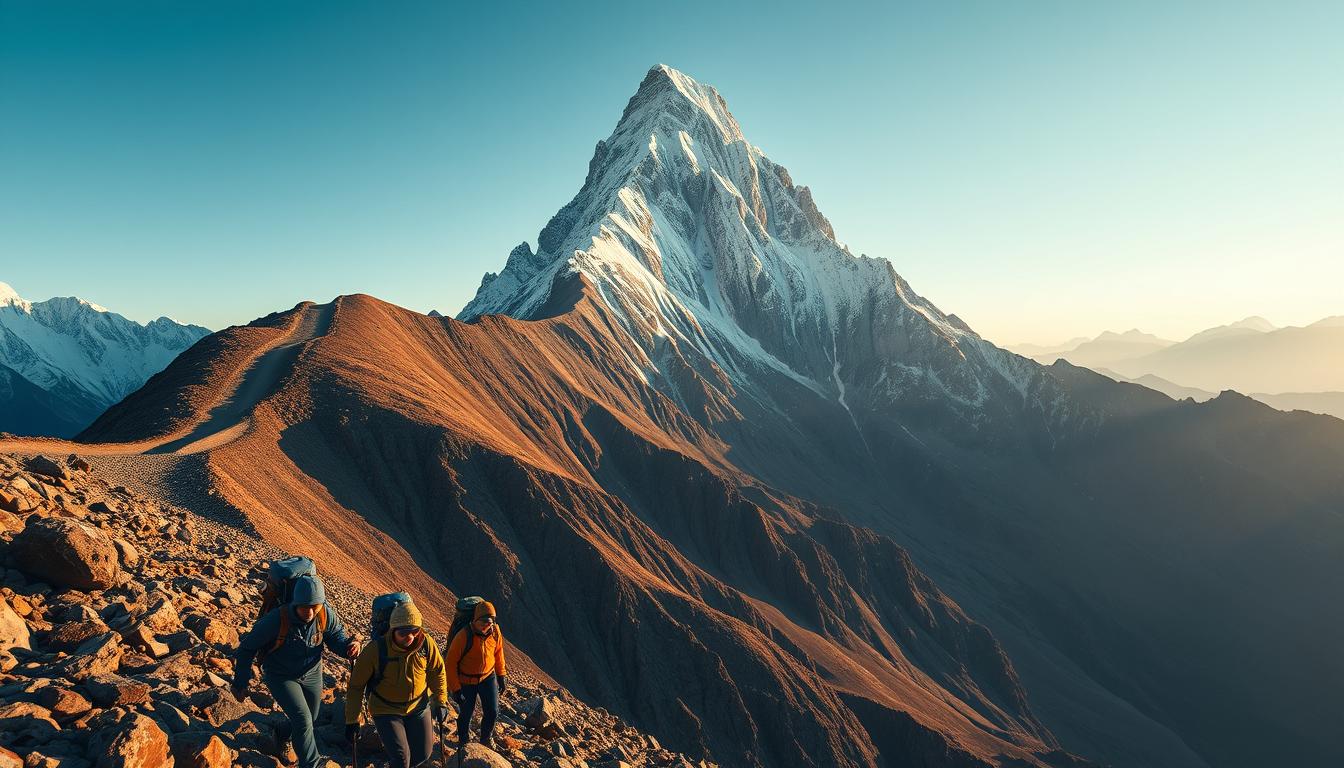
Some routes in north america turn normal miles into slow, technical travel that tests both body and mind. These sections combine rock, exposure, and repeated vertical that slow pace and demand respect.
Southern Maine — Mahoosuc Notch
Mahoosuc Notch is legendary for its one-mile boulder maze. Progress looks like slow-motion scrambling through tight squeezes and pack-passing moves.
Pace often collapses: insect swarms and wet boulders make a short route feel very long.
New Hampshire — White Mountains
These mountains offer exposed rock and runs with gains exceeding 1,000 feet per mile. Weather changes above treeline add another layer of challenge.
Virginia — The Roller Coaster
This 13.5-mile section packs ten steep climbs and descents in quick succession. Quads and mental focus take the hit; steady pacing and smart breaks win the day.
Northern Pennsylvania — Rock Gauntlet
Here the trail becomes a field of sharp stones and ankle-rollers. Foot placement matters every step and tired feet feel each rock.
Mt. Katahdin Ascent
The round trip from Katahdin Stream is roughly 10 miles with about 4,180 feet of gain. Steel rungs, big boulders, and gusty summit exposure create a memorable finish.
Southern Virginia Ridges
Ridge after ridge means repeated 1,000-foot ups and downs. The real test there is patience, fueling, and steady pacing over a long sequence.
- Plan water, shelter, and bail options—pace can vary a lot by terrain and conditions.
- Use trekking poles, sturdy footwear, and layered protection for windy peaks and rocky routes.
- Budget extra time; even strong parties often move far slower on these trails.
- Check local trail clubs and recent trip reports for current rock, mud, or blowdown updates.
“Choose objectives that match your strength: endurance for long miles, technique for exposed rock.”
Planning Your Hard Hike or Backpacking Trip: Time, Pace, and Decision-Making
A solid plan begins by matching expected miles and feet to your party’s real pace. Start with a clear baseline and add buffers for rough terrain, heat, and altitude.
Estimating time and setting turnarounds
Use the simple rule: 30 minutes per mile or per 1,000 vertical feet as your baseline. Then add time for rugged footing, long breaks, and slower downhill sections.
Group limits and route research
Let the least-experienced person set the steady pace. Plan rest stops and agree on decision markers tied to time, distance, or weather.
- Preview recent route reports and maps to spot choke points and water sources.
- Pack small contingencies: extra calories, insulation, and a light for late returns.
- Assign roles: navigator, pace-setter, and regroup leader to avoid split parties.
“Turnaround decisions based on time and objective markers protect future trips and keep everyone safe.”
| Planning item | Baseline | Action |
|---|---|---|
| Time per mile / 1,000 feet | 30 minutes | Add 25–50% for rough or high routes |
| Total feet (cumulative) | Estimate up and down | Plan extra breaks where gain concentrates |
| Group limits | Least-experienced sets pace | Adjust distance or objective early |
Gear That Makes Hard Hikes Safer and More Enjoyable with FiTiFT
Build a compact kit that suits long days, high elevation, and mixed terrain. The right tools speed navigation, protect joints, and keep a campsite warm after a long climb. Below are core FiTiFT picks that fit into lightweight backpacking and longer backpacking trips.
Stay found and be heard: Compass Survival Whistle 2 in 1 (stonewashing finish)
Small but vital. Use this for quick navigation checks and emergency signaling when route-finding gets slow or visibility drops. It saves time and keeps group spacing steady on narrow trails.
Manage cold nights on big elevation trips: Sleeping bag for all seasons (2.2 kg)
Warm, packable, reliable. A versatile bag handles sharp temperature swings on exposed camps and extends shoulder-season comfort for weekend trips and multi-night backpacking trips.
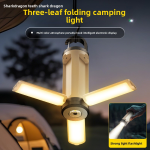
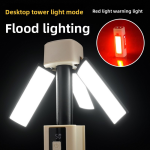
Night sections and early starts: Multifunctional high-intensity flashlight and EDC flashlight
Both lights support pre-dawn departures and dark descents. They free your hands for poles and map checks while giving focused beams for tricky footing.
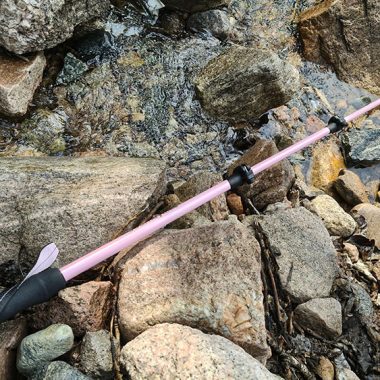
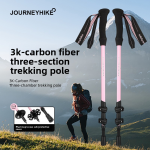
Save your knees and power your climb: 3K Carbon Fiber Trekking Poles (2-pack)
Poles cut knee stress on steep down sections, boost balance where you need extra hands, and add propulsion on long climbs.
Efficient camp cooking on rugged routes: Stainless steel wood stove (smokeless)
Fast boil, low smoke, and multi-fuel use make this stove a durable choice when fuel is scarce and you need a hot meal after a lot of miles.
“Match gear to your route: light, multi-use items win on mixed terrain and long days.”
| Item | Primary benefit | Best scenario |
|---|---|---|
| Compass Survival Whistle 2 in 1 | Navigation + signaling | Low light, route-finding |
| Sleeping bag (2.2 kg) | All-season warmth | High elevation, shoulder season |
| High-intensity + EDC lights | Reliable runtime, beam control | Pre-dawn starts, night sections |
| 3K Carbon Fiber Trekking Poles | Knee protection, balance | Steep climb/descend, scrambly approaches |
| Stainless steel wood stove | Smokeless cook, durable | Multi-day trips, limited fuel |
Quick pairing tip: poles plus lighting for scrambly approaches, whistle for group spacing on rolling trails, and a warm bag for exposed camps. Bookmark these FiTiFT items when you plan your next trip to align gear to trail demands and stay safe outdoors.
Conclusion
Translate miles and cumulative feet into a simple timetable, then pick clear turnaround points that fit your party’s pace and comfort on mixed terrain.
Read distance and elevation gain together to judge time on trail and where fatigue will hit. Train route-finding and practice when you need to use hands on rock before stepping into exposed sections.
Celebrate steady progress: weeks and years of hiking and backpacking turn tough climbs into manageable adventures. Build a dependable kit—lighting, poles, warm sleep, and a whistle—so weather and rough terrain don’t ruin a trip.
Bookmark this guide, compare routes, and shop FiTiFT gear to match your next objective: Compass Whistle, sleeping bag, lights, poles, and stove at the links above. Share trips and lessons; miles round trip teach the best lessons.
FAQ
Prepare for What is the hardest grade hike? with FiTiFT Gear
FiTiFT gear focuses on reliability and weight savings to help on steep, technical or long routes. Pack carbon trekking poles to reduce strain on knees during long descents, bring a four-season sleeping bag for high camps, and keep a compact compass-whistle and high-intensity flashlight for route finding and low-light travel. Choose footwear with sticky rubber and protective uppers for boulder fields and scree.
Understanding hiking difficulty today: how are trails graded and why does it matter?
Trail grades combine terrain, exposure, technical moves and endurance demands. Systems like the Yosemite Decimal System separate simple walking from scrambling and technical climbing. Knowing a route’s grade helps match skills, gear and time so you don’t get caught above your limits.
Yosemite Decimal System — what separates Class 1 from hard Class 1?
Class 1 means mostly walking on well-defined trails. A hard Class 1 section may be long, loose underfoot, or include steep pitches where pace slows but hands aren’t required. Distance and cumulative vertical gain turn easy miles into a tough day.
When does Class 2 require hands and route finding?
Class 2 features off-trail travel across scree, boulder fields or talus where you’ll use hands for balance. Route finding becomes important; map, compass, or GPS and experience reading terrain keep you on the safest line.
What should I expect on Class 3 terrain?
Class 3 involves sustained scrambling with exposure. You’ll use hands constantly, and falls can be serious. Many hikers carry helmets and consider lightweight ropes for insecure parties or when retreat is difficult.
How does Class 4 differ from Class 3? When should ropes be used?
Class 4 has high exposure and moves that border on technical climbing. Solid belays and roping are common, especially for less-experienced parties or on long exposed sections. A fall here can be fatal, so treat it like low-grade climbing.
What is involved in Class 5 and rock climbing grades?
Class 5 is vertical rock with distinct technical ratings from 5.0 to 5.15d. It requires climbing gear, anchors, and skills in rope management. In alpine settings, approach terrain and weather add complexity beyond single-pitch sport routes.
Which measures make a hike “hard” beyond technical class?
Distance, cumulative elevation gain and altitude matter as much as technical difficulty. Long mileage with repeated climbs and descents wears you down. High elevation adds breathing difficulty and increases risk of altitude illness.
Why does elevation gain per mile matter when reading steepness?
Gain per mile shows sustained steepness. A route that gains 3,000 feet in three miles is far steeper and slower than the same gain spread over ten miles. Use gain-per-mile to set pace, rest stops and realistic turnaround times.
How does high elevation above 7,000–8,000 feet change exertion?
Thin air reduces oxygen, so heart rate and breathing rise for the same effort. Expect slower pace, greater dehydration, and longer recovery. Acclimatize with progressive gains and plan conservative objectives on first days at elevation.
Can going downhill be as hard as climbing up?
Yes. Descending stresses quads, knees, and ankles and demands focus on foot placement in rocky terrain. Long technical descents can cause more soreness and injury risk than the ascent, so use poles and controlled steps.
How do grades compare with “extremely hard” hikes measured in miles and feet gained?
A low-class route with extreme mileage and 8,000–12,000 feet of gain can be harder than short technical sections. Endurance, logistics and exposure combine—so evaluate both class and quantitative stats when planning.
When does difficulty shift from a hard hike to a climb?
Difficulty shifts when moves require sustained vertical technique, protection, or belayed sections—typically starting in upper Class 4 and into Class 5. If hands and gear are essential to prevent a fatal fall, treat it as climbing, not hiking.
Which North American routes test endurance and technical skills?
Sections like the Mahoosuc Notch in Maine challenge with slow boulder travel, White Mountain routes add sustained alpine exposure, and Mount Katahdin includes scrambling with rungs and wind. Look for long cumulative gain, frequent rock, and remote exits.
How should I estimate time from miles and vertical feet?
Use a base pace for flat miles, then add time for elevation: a common rule adds 30 minutes per 1,000 feet gained. Adjust for terrain, altitude, and group fitness. Always build conservative margins for weather and route-finding.
How do group size and route research affect decisions on hard trips?
Larger groups move slower and require clear communication on objectives and bailout plans. Research route beta, hazards and water sources, then set go/no-go points and a turnaround time everyone accepts.
What FiTiFT items help on long, rugged trips?
FiTiFT suggests carbon fiber trekking poles for efficiency, a durable four-season sleeping bag for high camps, a compass-survival whistle combo for navigation and signal, a high-output flashlight for early starts, and a compact stainless steel wood stove for hot meals with minimal fuel.