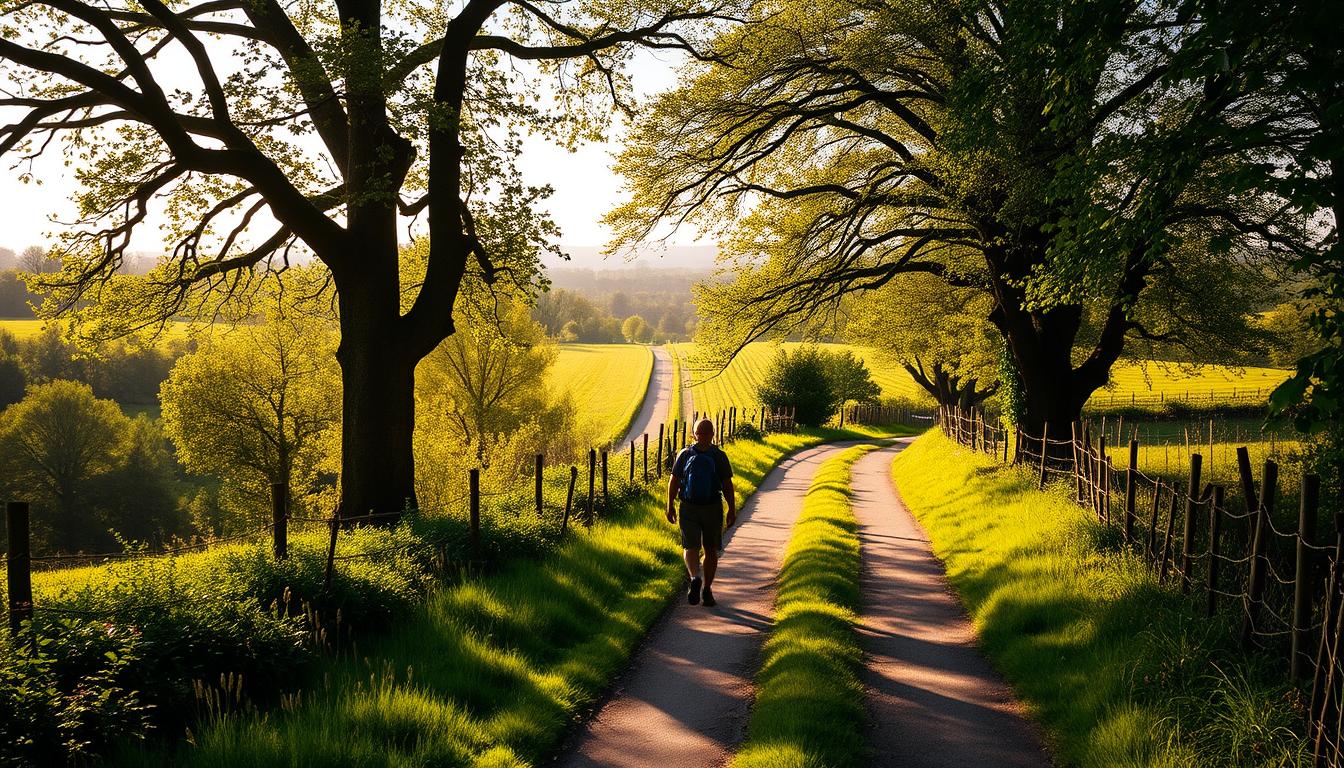
Hiking usually means purposeful walking over medium to long distances in rural or mountainous terrain. It’s not the same as a casual stroll in a park or a quick urban walk.
Intent, route, distance, time, and the condition of the terrain all shape whether an outing feels like a hike. A signed countryside route can be a gentle trip for some people and a full-on challenge for others.
Short walks may need only basic gear, while longer excursions demand preparation: good footwear, a compass or whistle, headlamp, trekking poles, a sleeping bag, and a stove. Brands like FiTiFT offer compact, reliable kit to bridge the gap between a walk and a true hike.
This guide will explain clear criteria—Distance, Time, and trail character—to help you name your outing with confidence and stay safe in varied Condition.
Key Takeaways
- Hiking implies purposeful, longer walks in rural or mountain settings.
- Distance, time on trail, and terrain tip a walk into a hike.
- Personal fitness and kit change how a route feels to different people.
- Bring essentials—whistle, headlamp, poles, and a sleeping bag—for longer trips.
- FiTiFT supplies practical gear that helps turn a simple walk into a safe hike.
User Intent and What You’ll Learn Today
Start by matching your available Time and planned distance to your current fitness and gear. That quick check will tell you if a route is Suitable for walking or better classed as a hike.
We cover the key item you need: clear definitions, difficulty ratings, weather and season effects, pacing, navigation, and risk.
You’ll learn how your situation and experience change the effort a trail demands. Every person reads this differently, so the tips are easy to adapt to your own situation.
We preview realistic scenarios showing how the same path shifts with pack weight, weather, or low daylight. Those examples lead to simple takeaways you can use this weekend: decision rules, essential kit checks, and time budgets.
Where gear matters most, we point to high-impact kit for safety and comfort so you spend wisely. If you’re short on time, we’ll flag the fast-read sections for quick, confident choices.
What Counts as Hiking vs Walking: Clear Definitions
Start by checking how far you’ll go, what ground you’ll cross, and how long you’ll be out.
Distance is the first filter. Short park loops feel like Walking distance and elevation rise, an outing tips
toward hiking.
Terrain changes effort fast. Uneven ground, mud, roots or steep sections make a short trip feel like a hike because terrain raises energy cost and risk.
Backpack walking, day hikes, and multi-day treks
Think of backpacking walking as a threshold. Carrying a backpacking with water, layers, and a whistle shows you expect trail variables.
- Day hikes: single-day plans with margin for delays and basic emergency kit.
- Multi-day Hiking: overnight gear, stove, and more navigation — much higher planning needs.
How body condition and experience change the label
Your Body and Experience shift the experience. A steep mile may be a full hike for a novice and a warm-up for a seasoned walker.
Pacing and posture matter: aim ~4–5 km/h on easy ground with rests. Lean slightly forward uphill and back downhill to reduce strain.
Does walking on a trail count as hiking? A Practical Decision Framework
A simple decision flow helps you decide if a route is a walk or a hike before you step onto the path.
Use distance and time thresholds to decide:if planned distance and expected walk time are short on even surfaces with many exits, treat it as a walk. As distance or time grows, or exits thin out, plan like a hike.
Use distance and time thresholds to decide
Estimate time from your usual pace on similar terrain and add a buffer for rests and navigation checks.
If you’d run out of daylight without a light, label it a hike.
Assess terrain type, elevation change, and remoteness
Upgrade planning for remote sections with few junctions, water, or bail-outs. Roots, loose rock, wet slabs or steep sections slow most people and need better footwear and poles.
Fold in your current situation: returning from injury or new to trails? Lower your pace and shorten the loop to keep margins safe.
| Checklist item | Walk threshold | Hike threshold |
|---|---|---|
| Planned distance | <5 km | >5 km or sustained elevation |
| Expected Walking time | <2 hours | >2 hours or after dark |
| terrain/ gradients | Even paths, clear exits | Roots, loose rock, steep 段 |
| Kit | Basic—water, layers | 1–2 L water, headlamp, first aid |
Decision checkpoint: if you’d feel unsafe without a headlamp, warm layer, or basic first aid, label the outing a hike and pack accordingly. Reassess at the trailhead—weather and fatigue can tip any route from walk to hike.
How Difficulty Ratings Work: From Easy Strolls to Demanding Treks
A clear rating tool helps you judge effort and risk before you lace up. Most guides use a 1–5 scale built from six practical it to estimate how hard a route will feel.
The six criteria that shape a grade
Distance and Time is the first filter: longer distance or more hours on trail raise the score.
Elevation change and footing matter next. Steep climbs or loose surfaces push a route up the scale.
Accessibility (bus stops, clear exits) and remoteness (how far from habitation) finish the picture. Poor access or isolation increase practical difficulty.
Why a rating can change
Ratings assume benignweather, a healthy person, and light packs. Change any of those and the grade shifts.
- Heavy rain, mud, or short daylight can make a level-3 feel like level-5.
- Direction matters: uphill starts bite more than downhill finishes.
- A big pack, scarce water, or poor transport links raise effort and risk.
Use ratings as tools, not rules. If a grade pushes your margins, err on the side of caution: reduce distance, add time buffers, and pack extra layers. As your experience grows, you can stretch goals—until then, choose conservatively and plan for changeable UK weather.
Myth-Busting: You Don’t Need Mountains for It to Be Hiking
You don’t need alpine peaks to call a route a proper hike. A coastal path, moorland or wooded route can be full-on hiking when the ground and distance demand planning and endurance.
Undulating cliffs, boggy heath, or rooty singletrack turn a short walk into real effort. For many people, packing a map, headtorch and basic safety kit is the signal that this is more than a stroll.
Urban-fringe trails with limited exits deserve the same respect as mountain tracks when weather or light turns. Treat footing, wind exposure, and navigation complexity as your compass for kit and choices.
Plan as if you might need a light or map — if you’d be uneasy without them, call it a hike.
- Broaden the definition: hiking is intent, challenge, and route character, not just altitude.
- Match kit to the route and trust your judgement when conditions change.
Real-World Benchmarks: Kumano Kodo Section Ratings
Real route numbers from the Kumano Kodo show how short links and long days feel on the ground.
The list below gives clear distance, expected walking time and a difficulty rating so you can match plans to your current health and fitness.
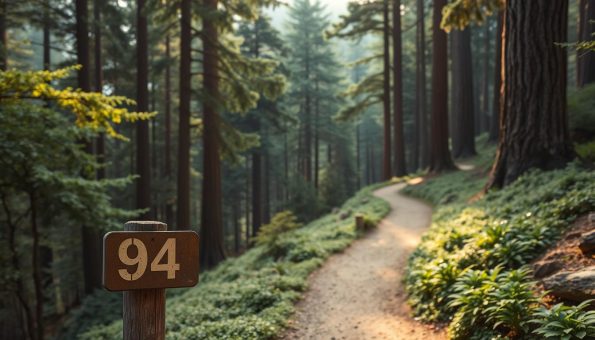
Short, accessible segments that feel like walks vs hikes
Daimon-zaka — Approximately 1 km, approximately 30 minutes, rated 1.5: A cultural walk suitable for most people.
Gyuba-doji-guchi to Chikatsuyu-oji — 1.3 km, approximately 30 minutes, rated 1: An easy link to recover between longer sections.
Full-day, remote segments that demand fitness and planning
Takijiri-oji to Tsugizakura-oji — Approximately 17 km, approximately 6 hours, rated 4: A full day that requires kit and pacing.
Ogumotori-goe — Approximately 14.5 km, approximately 5.5 hours, rated 5: A strenuous trek requiring both fitness and commitment.
Planning tip: choose routes that match your current condition
- Plan each segment by distance and time, adding buffers for breaks and poor weather.
Use short interludes (1–4 km) to alternate effort and recovery.
If you’re not confident taking steep steps, reduce your daily mileage and pack light.
Camino de Santiago Examples: Distance, Days, and Seasonal Fit
Many pilgrims balance available day and fitness when picking a Camino route; each option changes daily distance and recovery needs.
The French Route runs about 780 km and usually needs 30–35 days. The Portuguese Route ranges from 240–600 km and fits 10–25 days depending on start. The Northern Route is ~820 km and favors fit, experienced people for its rugged coast.
Choosing by time and fitness
Expect mainstream stages to average 20–30 km a day. Allow more time for hills, heat, or long transfers.
“Plan rest day into your schedule — fatigue compounds quickly on multi-day routes.
- Season: April–June and September–November bring milder weather and fewer crowds; July–August is hot and busy; December–February can be cold or closed.
Safety: long days on foot, road crossings, petty theft risk, navigation lapses, and psychological strain are real; Spain emergency number is 112.
Navigation: yellow arrows help, but carry offline maps and plan rest days to manage niggles.
| Route | Approx kilometer | Typical Day | Best Month |
|---|---|---|---|
| French (Camino Francés) | ~780 kilometer | 30–35 d | 4–6 m, 9–11 m |
| Portuguese | 240–600 kilometer | 10–25 d | 4–6 m, 9–11 m |
| Northern | ~820 kilometer | 30–35 d | 4–6 m, 9–11 m |
In 2024, 499,000 pilgrims finished the Camino, up from 446,000 the prior year. Choose your route by available days, realistic daily distances, and how much challenge you want the trip to add to your days.
How-To: Match Route Length to Your Time and Fitness
Match how far you plan to go with how your body feels today and your recent training. Start by assessing current condition and pick a daily distance you can repeat for several days without soreness worsening.
On mixed or rough ground, dial back your target time and distance. Consecutive-day stress shows what’s truly sustainable. Use past experience on similar surfaces to calibrate: if you only do road walking, reduce trail targets by 20–30% at first.
Work backward from available days to select the most suitable objective. Insert rest days and mark exit points so you can shorten a day if needed. Include weather and daylight margins so you’re not racing last light.
- Plan optional shortcuts or add-on loops for flexibility.
- Check how you feel at two hours: if form drops, shorten the next day.
- Even fit people benefit from conservative early stages for better recovery.
“Pick distances you can repeat without pain — that consistency beats one big push.”
| Assessment | Action | Why it helps |
|---|---|---|
| Honest Body Check | Set repeatable daily distance | Prevents cumulative fatigue |
| Mixed terrain | Reduce time and pace | Limits injury risk |
| Limited experience | Cut trail targets 20–30% | Builds confidence safely |
Training Smart for Safe, Enjoyable Hiking
Smart training pairs repeated exposure with focused strength work to keep you moving day after day. Start gradual and make practice hikes feel like the trip you plan to do.
Progressive distance and back-to-back day practice
Build weekly distances in small steps and include back-to-back days so your body learns recovery routines.
Do two dress-rehearsal weekends on similar terrain to test fueling, layering and pacing at ~4–5 km/h.
Pack-weight targets and lower-body/core strength
Calibrate your backpack early. Most people find ~10% of body weight works for Camino-style stages; tweak for water and weather.
Train strength with squats, lunges, step-ups and planks to support joints and posture. This boosts physical health and reduces injury risk.
Practice Backpacking Walking weekly to spot hotspots and adjust straps.
Track body cues—heart-rate drift, foot fatigue—to manage training time and avoid overuse.
Use deload weeks so gains consolidate and you stay fresh.
| Element | Target | Why it helps |
|---|---|---|
| Consecutive days | 2 weekends | Teaches recovery and pacing for multi-day Hiking |
| Pack weight | ~10% body weight | Balances load and comfort for long distance |
| Strength work | 2–3 sessions/week | Stabilises hips, knees and core |
“Do your testing long before the trip—refine socks, poles and footwear in training.”
Weather and Season: When a Walk Becomes a Hike
Conditions on the day decide whether a route stays a stroll or becomes a serious hike.
Spring (April–June) and autumn (September–November) usually give 15–25°C and long, pleasant days. Summer (July–August) is hotter and busier. Winter (December–February) brings cold, possible closures, and shorter days.
Shifting weather and shorter daylight can cut your margin for error. Mud, slick rock, and swollen crossings after rain change footing fast. In those situations, reduce planned distance and upgrade kit.
Carry insulation and a headlamp in shoulder month; late starts eat usable time.
In hot days, add water, sun protection and early starts.
Winter raises remoteness as close facilities; bail-outs shrink.
“Adverse weather is often the tipping point — treat it as a planned upgrade from walk to hike.”
| Season | Typical °C | Practical advice |
|---|---|---|
| Spring / Autumn | 15–25°C | Carry layers and a headlamp for short light days |
| Summer | High / variable | More water, shade breaks, start early |
| Winter | Cold / closures | Expect fewer services; shorten distance and plan detours |
Essential Kit Checklist for Trail Days and True Hikes
A compact, tested checklist is the easiest way to stay safe on varied ground. Choose kit to match the planned distance, expected time, and the local terrain. Start light for a day trip and add redundancy for remote or overnight trips.
Footwear, layers & hydration: Pick boots or shoes that suit the ground and moisture. Wear wicking baselayers, an insulating midlayer, and a waterproof shell. Carry a breathable backpack sized for your food, water and spare insulation. Pack 1–2 L for short walking, more as distance, heat, or remoteness rise.
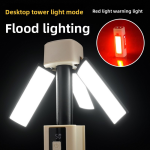
Navigation, light & signals: Always carry a map and compass plus a backup app. FiTiFT’s Compass Survival Whistle 2-in-1 offers both a bearing tool and a high-decibel whistle — small kit with big function. Bring a headlamp and FiTiFT EDC Flashlight — Red or Multifunctional High-Intensity Flashlight — Orange for short and long-range visibility.
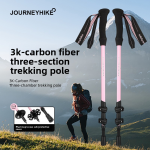
First aid & multi-day add-ons: Have a compact first-aid kit tuned for blisters and minor trauma. For overnight trips, add the FiTiFT Sleeping Bag for All Seasons and a Stainless Steel Wood Stove for boiling water. Use FiTiFT 3K Carbon Fiber Trekking Poles to reduce joint load.
| Item | Recommended for | FiTiFT pick |
|---|---|---|
| Navigation & signal | All routes | Compass Survival Whistle 2-in-1 |
| Lighting | Late finish or poor light | Multifunctional High-Intensity Flashlight / EDC Flashlight |
| Poles & sleep | Long days / multi-day | 3K Carbon Fiber Poles; Sleeping Bag for All Seasons |
| Stove | Remote overnights | Stainless Steel Wood Stove |
“Fit-test everything on short walks so your body and backpack work together before longer days.”
FiTiFT Gear Picks to Elevate Safety and Comfort
Smart, small upgrades deliver big practical gains on both short loops and long days. These picks slot into real scenarios—dawn starts, wet steps, and nights that run long—so you cover more ground with less stress.
Stay found and heard
Compass Survival Whistle 2-in-1 is a tiny upgrade with outsized action. It speeds orientation and signaling for people practicing solo backpacking and walking at dawn or dusk. The combo compass and whistle saves weight and thought during low-visibility moments.
See and be seen
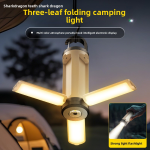
The Multifunctional High-Intensity Flashlight — Orange pairs with the compact EDC Flashlight — Red. One gives a powerful beam for long distances; the other fits a pocket for quick use. Together they cover variable distance and lighting needs across day and night.
Go farther, rest better
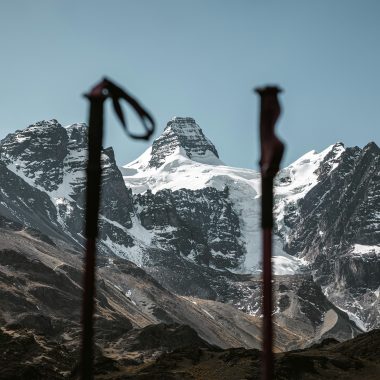
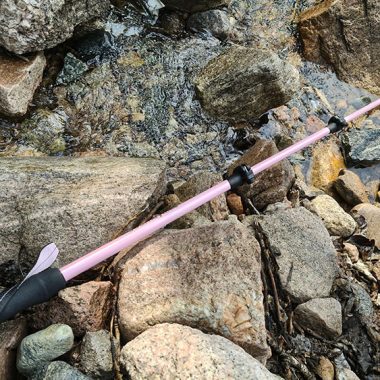
3K Carbon Fiber Trekking Poles improve cadence and stability on wet steps and gravel. They let you extend comfortable walking while sparing knees and ankles.
A dependable All-Season Sleeping Bag turns marginal nights into restorative rest. That support keeps energy up for consecutive days and makes earlier starts realistic.
“Thoughtful pairings—poles plus lamp, whistle plus map—transform confidence and keep plans rolling.”
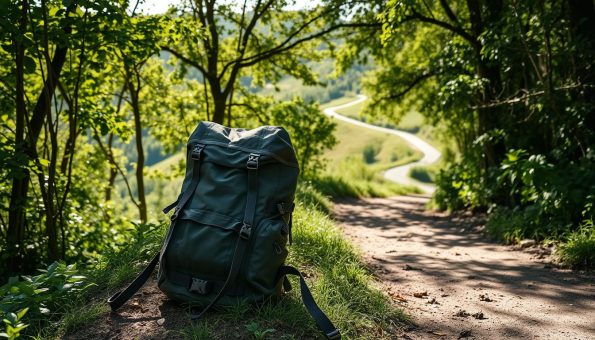
Practical take: add a well-fitting backpack and these items form a compact, versatile system. Durable kit prevents small failures from cutting days short, so you enjoy the route and focus on movement, not fixes.
Nutrition, Pacing, and Rest: Managing Time and Distance
Good pacing and smart fuel choices keep you moving safely across a day on trail. Plan hourly goals that match your fitness and the ground underfoot.
Hourly pace targets and recovery breaks
Hourly targets: aim for ~4–5 km/h on easy ground. Track actual versus planned time and spot a 10–15% slowdown early.
Rest rhythm: take ~15 minutes after each hour to refuel and stretch. A longer midday break in shade helps on hot days.
- Set conservative hourly goals and log splits; adjust if pace drifts.
- Hydrate steadily, add electrolytes, and eat simple carbs plus a little protein to avoid crashes.
- Many 人 find poles help keep a steady cadence and save energy on rough ground.
- If your body shows fatigue—stumbles or sore feet—stop earlier and protect recovery.
| Focus | Practical tip | Why it helps |
|---|---|---|
| Pace | 4–5 km/h on easy ground | Predictable Walking time and steady energy |
| Breaks | 15 min each hour; longer midday rest | Prevents late-day fatigue |
| Fuel | Carbs + small protein, salts | Maintain blood sugar and hydration |
“Review the final hour’s split to refine tomorrow’s walk targets and snack timing.”
Navigation and Route-Finding on Signed Trails
Clear markers help, but smart navigation keeps you on track when conditions change.
Camino yellow arrows and scallop shells are usually reliable, yet misroutes happen at tight junctions and in towns.
Carry offline map apps like Buen Camino, Camino Ninja, or Maps.me and preload alternates for detours or maintenance closures.
Read the surrounding terrain—ridges, streams, and contour shapes make the map click with the ground. That reduces screen time and panic when tired.
Budget extra time at complex junctions instead of guessing. A short check saves long backtracks.
Keep a small baseplate compass for fog or late mistakes; it gives instant orientation without draining battery.
When you travel in a group, assign a navigator and a verifier so more people helps, not hinders. Toggle airplane mode to save power while keeping GPS dots active.
“A calm re-check beats a rushed choice—navigation is a habit, not luck.”
| Tool | When to use | Benefit |
|---|---|---|
| Offline map app (Buen Camino, Maps.me) | City sections, lost markers | Reliable routing without mobile data |
| Baseplate compass | Fog, tiredness, or phone failure | Quick orientation, battery-free |
| Preloaded alternates | Floods or maintenance closures | Fast decisions, less time pressure |
Risk Management on the Trail: Traffic, Theft, Blisters, and Weather
A few simple checks cut most trail hazards before they become serious. Good habits protect you and others on road sections, in busy towns, and when weather turns. Keep plans small, clear, and shared so any 人 can act fast.
Urban crossings, valuables, and emergency contacts
Plan road crossings like a technical part: check sightlines, remove earbuds, and assume drivers have not seen you. That vigilance prevents near-misses.
Keep valuables minimal, locked, or on your person in hostels. Use line-of-sight storage and hostel best practices in busy areas.
Store emergency contacts and Spain’s number 112 on your phone and on paper. Brief the group so any people can call and give concise info under stress.
Blister prevention and foot care after long days
Blisters start small. Treat hotspots immediately with tape and a sock change. Swap damp socks—maceration raises blister and slip risk in changeable weather.
For larger blisters, use a sterilised needle to drain fluid without removing the skin, then apply antiseptic and a dressing. Rest, shade, and hydration speed recovery.
Match footwear to conditions and cut tight timelines. If time compresses or a storm front moves in, turn around decisively. Fatigue is its own hazard; shorter days protect long-term progress.
| Risk | Key action | Why it helps |
|---|---|---|
| Road interactions | Plan crossings, assume unseen | Reduces collision risk |
| Theft in towns | Minimal valuables, lock, keep sight | Limits loss and stress |
| Blisters | Hotspot tape, drain with sterile needle | Prevents infection and longer stop |
| Weather & fatigue | Shorten days, swap socks, monitor 人 | Maintains safety and recovery |
“Debrief daily Condition — note what went well and what almost didn’t — so tomorrow’s plan keeps everyone safer.”
Trail Etiquette and Access: What Responsible Hikers Do
Good trail manners keep paths open and communities welcoming for everyone.
Travel light, travel kind. Move in small groups and adjust your pace to the slowest person. That keeps the flow steady and reduces erosion on narrow terrain.
Yield politely—announce passes early, step off the main line on wider ground, and keep voices low so other people can enjoy the soundscape.
Follow local access rules and signs to protect habitats and keep beloved route open. Pack out all waste; carry a small litter bag to leave the trail tidy.
- Keep groups compact to limit trampling and let others pass.
- Offer help quietly if asked; use your experience to model good practice, not lecture.
- Dogs must be controlled near livestock and on closures—respect diversions and fences.
- Rest slightly off the tread on steep superior steps or bridges to avoid pinch points.
“Thank volunteers and locals—polite gratitude helps maintain access and goodwill.”
| Action | When | Why |
|---|---|---|
| Yield and announce pass | Narrow or technical sections | Prevents collisions and keeps traffic moving |
| Pack out all litter | Always | Protects wildlife and preserves access |
| Keep group compact | On soft edges or fragile ground | Reduces erosion and preserves vegetation |
| Control dogs | Near livestock or closures | Respects farming and safety rules |
When Does a Simple Trail Walk Become a Hike? Quick Scenarios
Small changes in ground, kit or daylight turn a casual loop into something that demands real planning. Picture the route, the exits, and the things that could go wrong. That short check often decides whether to travel light or pack emergency kit.
Short local loop with minimal gear
A signed park loop of modest distance with even footing and frequent exits usually feels like a walk. No poles, minimal layers, and a flexible turnaround make it low stress.
Add roots, slick timbers, or steep gradients and the same loop leans toward hiking. Footing and balance demand attention and extra time margins.
Half-day undulating trail with a light pack
A half-day ridge-and-woodland mix with changing surfaces and an intermittent signal qualifies as a hike. Carry a light pack for water, layers, a headlamp and a whistle.
If your condition is off—sore knee or poor sleep—choose the best shorter option. On hot days, add water and sun protection; on windy ridges bring a windproof.
“Pre-visualise the day: ask, ‘What could go wrong, and am I equipped to handle it?’”
Conclusion
Finish strong: align what you plan to do with what your health can actually sustain. Choose the best route using the definitions and ratings above, then pack essentials so small problems stay small.
Across the year, weather and daylight change the game. Make conservative calls when uncertainty grows and remember that a short walk can feel like a hike if conditions or fitness shift.
FiTiFT gear scales from easy countryside days to multi-day routes—compass whistle, flashlights, trekking poles, sleeping bag and wood stove at fitift.com help you stay safe and comfortable.
Whether you call it a walk or hiking, plan for your limits, share paths kindly with other people, and enjoy the movement. Each outing sharpens pacing, kit choices, and confidence for the next walk.
FAQ
Hiking Defined — Is walking on a trail considered hiking?
Walking on a trail can be hiking when factors like distance, terrain, elevation, and remoteness raise the physical or navigational demand. A short, flat park loop feels like a walk. A multi-hour route with uneven ground, steep sections, or limited access becomes a hike.
What will I learn about user intent in this guide?
You’ll learn how to distinguish casual walking from hiking, how to match routes to fitness and time, what gear matters for day trips versus multi-day treks, and simple planning and safety steps that fit most conditions.
How do distance, time, and terrain differentiate hiking from walking?
Distance and time set baseline effort: short, low-effort outings are walks; longer, sustained efforts are hikes. Terrain and elevation multiply effort—rocky, steep, or remote sections require more fitness and skills, pushing a route into “hike” territory even at moderate distance.
What’s the difference between backpack walking, day hikes, and multi-day treks?
Day hikes are single-day outings with a light to moderate pack. Backpack walking implies carrying overnight gear and planning for resupply or campsites. Multi-day treks include consecutive days on trail, heavier packs, and higher logistical needs for safety and comfort.
How does my body condition and experience change the definition of a hike?
Fitness, recent activity, and trail experience change how demanding a route feels. A fit person may treat a 20 km undulating route as a long walk; a beginner might call the same route a strenuous hike. Always match route choice to your current condition.
Is there a practical decision framework for deciding if a trail walk is a hike?
Yes. Use simple thresholds: time on trail (e.g., under 1 hour = walk; over 2–3 hours = hike for many people), terrain difficulty, elevation gain, remoteness, and required gear. Combine these to judge whether to treat the outing as a hike for planning and safety.
What distance and time thresholds should I use to decide?
Thresholds vary by region and person, but commonly: under 5 km and under an hour on flat trails feels like a walk; 5–15 km or 1–4 hours often becomes a hike depending on terrain; beyond that, or with big elevation gain, treat it as a hike requiring more planning.
Which six criteria define difficulty ratings on trails?
Most systems use: distance, time, elevation change, terrain technicality, accessibility, and remoteness. These together define how much fitness, gear, and navigation skills a route demands.
Why do difficulty ratings change with weather, season, pack weight, and direction?
Wet or icy conditions make terrain harder. Seasonal factors like snow or heat change risk and pace. Heavier packs slow you and increase exertion. Direction matters on exposed ridges or steep descents—conditions and load shift difficulty even on the same route.
Do you need mountains to call something a hike?
No. Flat, remote, or exposed lowland routes with long distance, tough footing, or logistical demands still qualify as hikes. The key is the required effort, skills, and preparation—not elevation alone.
How do short Kumano Kodo segments compare to full-day remote sections?
Short Kumano Kodo segments are often accessible, lower-effort portions suitable for casual hikers. Full-day or remote sections demand navigation, more fitness, and planning for food and water—treat them like true hikes or multi-day treks.
How should I choose Camino de Santiago routes by fitness and time?
The French Way suits longer-distance hikers who can handle steady daily mileage. The Portuguese Way offers shorter stages and flatter terrain for moderate fitness. The Northern routes are more rugged and suit those with more time and higher fitness.
How do I match route length to my available time and fitness?
Estimate realistic hourly pace given terrain and pack weight, then choose stages that let you finish before dark with buffer time. For beginners, pick shorter distances and build up with back-to-back training days.
What training helps make hiking safe and enjoyable?
Progressive distance increases, back-to-back practice hikes, pack-weight training, and strengthening lower-body and core muscles reduce injury risk and improve comfort. Add balance work and graded uphill sessions.
When does weather turn a simple walk into a hike?
Heavy rain, heat, snow, high winds, or sudden storms raise risk and physical demand. A familiar flat trail can become challenging or unsafe—check forecasts and be ready to treat it as a hike with proper gear and contingency plans.
What essential kit should I carry for trail days and true hikes?
For day hikes: sturdy footwear, layered clothing, rain protection, water, snacks, map or GPS, headlamp, whistle, and basic first aid. For multi-day trips, add shelter or sleeping bag, stove, extra food, and navigation backups.
Which FiTiFT gear items help with safety and comfort?
Useful picks include the Compass Survival Whistle 2-in-1 for location and signaling, multifunctional high-intensity flashlights and EDC lights for visibility, carbon fiber trekking poles for efficiency and joint relief, and an all-season sleeping bag for overnight comfort.
How should I manage nutrition, pacing, and rest on trail?
Target steady hourly paces appropriate to your fitness and terrain. Eat small, frequent snacks with carbs and electrolytes, drink regularly, and schedule short recovery breaks and a longer midday rest on long days.
What navigation basics apply to signed trails?
Even on signed trails, carry a map, compass or GPS, and confirm junctions visually. Learn to read trail markers and note escape routes and water sources so you can adapt if conditions or time change.
How do I manage common trail risks like traffic, theft, blisters, and weather?
Cross roads with caution, secure valuables or leave them at home, use well-fitted footwear and preventive tape for blister-prone areas, and prepare for weather with layers and contingency plans. Share itinerary and emergency contacts before remote outings.
What does good trail etiquette and access look like?
Stick to marked paths, leave no trace, respect wildlife, yield appropriately to other users, keep dogs under control, and follow local access rules to preserve routes and community goodwill.
When does a simple trail walk become a hike? Quick scenarios.
A short local loop with minimal gear typically stays a walk. A half-day undulating trail with a light pack often becomes a hike. Add rough terrain, elevation, remoteness, or multi-hour duration and classify it as a hike for planning and safety.